The Game Creators Newsletter Issue 30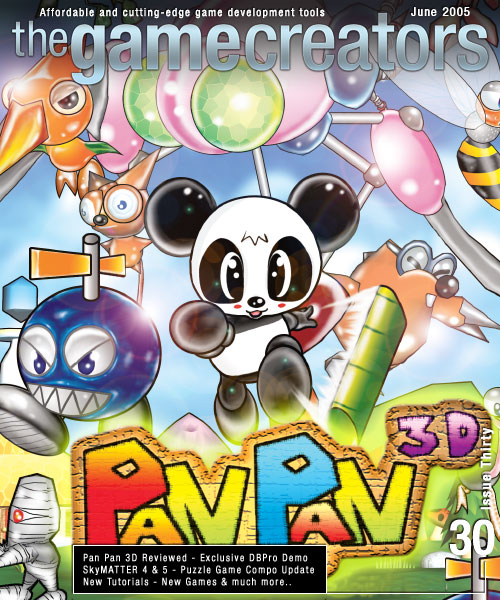
Welcome to Issue 30 of The Game Creators newsletter. Wow, 30 whole issues?! I know that it's not a milestone from a date perspective, which will come with issue 36 and being 3 years old, but it's still heck of an achievement to have made it this far! The big 3-0 :) Finishing this issue early and so close to Issue 29 made me realise just how rapid the rate of new information from us, our partners and our community is. Even during the warm summer months it would appear you guys are still as creative and active as ever. 
We've got some great items lined-up for you this issue. The awesome front cover comes from a brand new commercial game called PanPan3D, released into shops this August. We talk to the author and bring you exclusive pictures from the Bangkok Games Show. In somewhat of a tutorial overload we've got no less than 2 DarkBASIC Professional Tutorials, 1 Omega Basic tutorial and one for PlayBasic too! You'll notice that the source code is starting to be separated off into its own web page to keep the newsletter size manageable. But it's not all tutorials - there are new SkyMATTER packs, plenty of forum chatter, game releases, lots of new DBPro DLLs (including a brilliant 3D Text one), a superb exclusive Issue 30 Demo and of course the ubiquitous "much more"! I hope you enjoy this issue - a little earlier than usual, but still crammed to the brim with content. As always please send me your feedback and contributions. ContentsPuzzle Game Competition- You've still got time to enter this! The deadline isn't until Monday 18th July 2005 - 
Common Question: Introduction: We wanted to run a small game making competition for our members, something that you could sink your teeth into for a month or so, submit a game at the end of it and possibly win some prizes in the process. So we're pleased to announce our new Puzzle Game Compo. This is a mini competition meaning you get less time to create your entry, but the scope of the competition should be ample enough for anyone to give this a bash regardless of skill level. It's also a genre that lends itself well to 2D or 3D and where graphics don't have to play the major role. Here's what you need to do: The competition this time is to create a puzzle game. There are no set restrictions on what kind of puzzle game is allowed. It can be 2D or 3D. It could be a Tetris clone or a board game, whatever you end up creating it just has to be considered as a puzzle game by the masses - because this time around it is the community that will vote for the winner, not The Game Creators (we will of course cast our votes too, but they will hold the same weight as everyone else). So just to clarify - make a puzzle game and submit it before the deadline and if the community votes it high enough you may win some prizes :) Here are some great looking Work in Progress entries for this competition: More details: //www.thegamecreators.com/ PlayBasic - Building a better mouse trap Last month we quickly introduced PlayBasic to you all, so this time around we'll pick a few specific features and take a deeper look at them. We'll start by examining some of Sprite Render Modes. Sprite Render Modes PlayBasic currently has 15 different sprite render modes. Including Rotation / Alpha Blending / Gouraud Blending / Colour Addition and Colour Flash to name a few. Today we'll look some of my favorite effects. Those being Colour Flash and Alpha Colour Addition and Subtraction. No doubt if you've ever played a scrolling shoot'em up or platform game, you've seen these effects in action. Colour Flash is generally used in games where the flashing (generally white) represents a hit to either the bad guys or the player. So when building PlayBasics Sprite engine, I wanted to be able to replicate this effect for users. But not just flashing the sprite white, but any colour the you wanted. This is done by setting the sprites draw mode to 'Rotate + Colour flash'. The flash colour is controlled using the SpriteFlashColour command. So when the sprite is drawn next, any dot within the sprites image that is not transparent, will be rendered as the flash colour rather than its normal colour. You can change the flash colour any time you like. 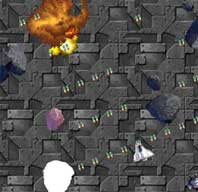
Alpha Colour Add / Sub Alpha colour addition / subtraction allows us to apply a uniform colour offset to the sprite in real time. Effectively what happens is that colour you supply is added to every pixel in the sprite image while it's being drawn. You can use this to brighten, dull or colourize (to a point) a sprite. While it's a little more expensive to compute than colour flash, it can look a lot nicer. Note: All Sprite draw modes in PlayBasic support rotation. You can see an example of these effects in recent Tech Demo called PB Blaster (demo and source in link). While the demo was built to demonstrate rotated sprite collision (see bellow) it also features real time rotation as well colour flashes, alpha colour addition and subtraction to show sprite impacts. Explosions are also slightly colorized using the alpha addition/subtraction. Remember, effects don't make good games, clever designers do. Passing Arrays Arrays and data management are like the ugly ducklings of programming, while their certainly not glamorous, they do make up the very basis of every program. So it stands to reason, that in order to make programming easier, Array support needs to move beyond the basics and become more advanced also. While PlayBasic has an entire command set devoted to Array manipulation, Today I just want talk about Passing Arrays. Passing Arrays refers to a way we can build more generic set of functions into our programs. Often when we write a Function, the code in our function is manipulating information found in some global arrays. Now, If this function only ever needs to be used for this purpose, then it's optimal, but what if we need to build a function that can manipulate different arrays? In many Basic languages, we'd have to manually write and call different versions of the Function for every array we wish to manipulate. That's not only time consuming to write, but wasteful. This is the perfect situation where Passing Arrays would solve this problem. What Passing Arrays allows us to do, is use Arrays as input parameters in our functions. So when we call this function, rather than performing it's work upon a hard coded global array, it actually works upon the passed array (whatever array we choose to send it) data instead. For some users this might be ringing alarm bells, thinking that the array needs to copied inside the function every time your function is called. Which would really invalidate the feature, as the overhead of coping the memory would be too great. Thankfully it doesn't, rather than coping all the data in, it passes a special pointer to this array data. So it's nice and fast. In this example, were using same functions to initialize and display the information in two different arrays: Click here to view the source code Array Passing also works for Typed Arrays and Typed Variables. Advanced Collision Systems Pixel Perfect and Sliding Collision Unfortunately when working on a project as vast as PlayBasic, at times some feature revisions have to be pushed down the work schedule to meet release commitments. Sadly Sprite Collision and World Collision have fallen into this category. While there is currently provisional systems in place, they really just represent basic collision. So since last month, we've been working purely on collision systems for Sprites and the World systems. I was hoping to have this update released before this newsletter, but unfortunately it's not quite ready. It should be finished later this week though. Here's what we have so far: In the current PB development version = Sprites now have four built in modes for inter sprite collision which include: Rectangles, Rotated Rectangles, Circular, and Shape. While the first three are self explanatory, the Shape Mode will appeal to people wanting more accurate (pixel perfect) styled collisions without the performance hit of 'pixel based' methods. Shape mode allows the programmer to attach a vector shape outline to any image. When these images are used as sprites, the collision engine an determine if the shape outline are overlapping or not. Since the shape can be user defined, the collision regions of any image can be customized. Allowing some sections to be solid, while other aren't, regardless of the pixel data. Not only that, the collision shapes can be rotated/scale/flipped with the sprite. The other major Work in Progress has been building the Sliding / Ray Engine into the World Buffers. Effectively this will give Play Basic users access to a built-in sliding collision engine with a super fast spatial partitioning and ray intersections. This system will be in value for the over head games or custom platformers where the user need the characters to walk on any type of slope with a map you care to design. You can find Tech Demos of both systems here: Shape Based Sprite Collision Play Basic is on sale now for $34.95 (€26.99, £18.99) Web Site: //www.thegamecreators.com SkyMATTER Packs 4 & 5 ReleasedTwo brand new SkyMATTER packs have been released which provide another 28 high quality sky box texture packs suitable for a wide variety of games and demos. Pack 4 features 14 texture sets including: Mountain Terrain, Tropical Sunsets, Sandy beaches, Stormy waves, Martian Planets and more. Pack 5 features another 14 unique texture sets including: Misty Horizons, Green Rolling Hills, Deep Valleys, Lava Landscapes, Snowy Mountains and more. The SkyMATTER textures are 512x512 pixels in size and can be used for sky boxes or cube mapping in any suitable language. Each pack costs $19.99 (€16.99, £9.99) and is available now. More details: //www.thegamecreators.com/?m=view_product&id=2135 Dark Game SDK 1.1.1 BetaJust a quick note to say that you can now download the latest version of the Dark Game SDK in BETA form. This file is only available to registered owners of the Dark Game SDK and is listed on your Order History page as the Beta Upgrade 1.1.1 File. You will need to be logged in to access this page. The main fixes in this version are related to terrain and the problem with the collision function not casting correctly. The files you need to install are found in the SDK folder. You will find updated include and lib files here. Copy these over your current include and lib folders. You may want to backup your current files just in case of any problems. The Dark Game SDK is available now for $60 (€45, £32) from //www.thegamecreators.com/?m=view_product&id=2128 More details: http://forum.thegamecreators.com/?m=forum_view&t=55002&b=22 PC Extreme - Graphics Card Workshop - Shader Models 
Each month the tech gurus over at PC Extreme magazine delve into a current or emerging PC technology, always with a gaming / development related theme. This month: Wil Harris presents Shader Models. This month we're going to get down and dirty with models. No, not Kate Moss or Naomi Campbell - we're talking about shader models. These are the Microsoft standards that define the capabilities of graphics platforms. Let's start at the beginning. Almost every PC game produced today is written on the DirectX platform. This is an integral part of Windows. Direct3D is the 3D facet of DirectX and the shader specifications are part of this. DirectX is currently at version 9.0c. The previous major releases were DirectX 7 and 8. Each of those releases saw a major revision to the shader model specification, and was accompanied by graphics hardware equipped to take advantage of teh changes. The step up to DirectX 7 saw the Nvidia GeForce 4600 released, which had the first implementation of shaders, albeit in a rudimentary fashion. DirectX 8 was the platform for the GeForce FX and the Radeon 9800 which followed. DirectX 9 heralded the latest release of cards, with the GeForce 6 series sporting the fullest compatibility. Through those three major DirectX leaps, there have been three main shader iterations: DirectX 7 saw basic shader support; Shader Model 1.1 and 2.0 and upwards (the revisions being known collectively as 2.x) came with DirectX 8; and the latest, SM 3.0, is supported by Direct X 9. But what the heck do these things do? Pixels and verticesShaders are small programs tha alter pixels or vertices. Consequently, there are two major types of shader - pixel shaders and vertex shaders. These programs add effects to basic geometry. A water-styled shader can be added to a flat blue texture to make it look reflective, for example, or a glass-styled shader can be added to a polygon to make it appear transparent. These shaders are the key to what makes the graphics in today's games look so much better than the graphics in games from three, four or five years ago. The shaders are programmable, so games developers can make their own, allowing them to create a unique look and feel. However, companies like Nvidia and ATI have standard libraries of shders optimised to run on their cards, and these are also used by programmers where they don't need to create a particularly unique kind of effect. So when are the different shader models used, and what difference do they make? Well, for a full rundown of the raw differences between the three specifications, take a look at the box-out below (Shader shenanigans.) But the main differences between them can be summed up fairly easily. Each revision has allowed for the length of a shader - the number of separate instructions that can be executed - to be increased, enabling increasingly complex and sophisticated effects to be created. The ways in which the programs can be written has also improved - the 1.1 specification provides for straight code, whilst the 2.x revisions allow for some looping to repeat lines of code. The 3.0 model allows for dynamic branching along the lines of "if then" statements. Increasingly smooth techniques for cutting the length of code have been introduced, allowing for speed improvements. Possibly the biggest single change between the 2.x and 3.0 specification is the addition of vertex texture lookups in 3.0, which allows for displacement mapping to take place. As with all technological changes, things haven't exactly gone according to plan when it comes to the upgrade path and hardware vendors haven't all leapt on board with the same degree of commitment. Nvidia has been making a huge amount of noise about the SM 3.0 support in its current hardware, something ATI doesn't have. But with up to half their market without the ability to run 3.0 routines, game developers haven't been quick in their implementation. It's only now we're really starting to see games come out that take advantage of the capabilities of the specification. Previous games, such as Far Cry, used 3.0 as a way of speeding up render routines, because most things that can be done in 3.0 can also be done in 2.x, albeit with a performance hit. But later patches have added support for HDR lighting and the like, which are 3.0 exclusive. Shader shenanigans
SHADER LENGTH allows for longer shader programs to create more complex effects. Where complex effects are obtained by concatenating routines in a lower shader model, performing them in the next one up provides performance benefits. DYNAMIC BRANCHING allows for much more elegant conditional structure than using nested looping. SM 1.1 isn't even able to use this, limiting what can be done. BACKFACE REGISTER allows for two lighting calculations to be done in one pass, speeding up those operations. COLOUR DEPTH allows for more accurate and dramatic colour representation. NESTED LOOPING - This improvement to the base 2.0 model appears in 2.0b, and is supported by ATI. VERTEX TEXTURE LOOKUPS - This allows for dislacement and parallax mapping, to give the effect of height to textures. ImplementationJust what difference do the specs make to games, then? Well, we're already touched on Faar Cry. Patch 1.3 added full SM 3.0 support to the game, and a performance increase on hardware supporting it was very apparent - we saw the average frame rate leap from 43 to 50 FPS on a 6800 Ultra at the highest settings. Throughout the game, there was around 15% extra performance, testament to the fact that whilst the 3.0 and 2.x paths look mighty similar, the code compromises required in 2.x clearly hit performance. If you want to see for yourself, you can type the following at the console to force either 2.0b or 3.0 respectively: /r_sm2xpath 1 or /r_sm30path 1. The higher colour precision means that the 3.0 path allows high dynamic range lighting, presenting a much more varied colour range on the screen. Bright bits are brighter and dark bits darker, with the overall experience appearing far less bland. There's a big performance hit for enabling it, due to the extra precision on the mathematical calculations, but the next generation of hardware should be far more competent and make this less of an issue. There are also clear advantages to be had in the latest version of Splinter Cell, Chaos Theory. Here, the developers have chosen to implement two shader paths - 1.1, for legacy hardware, and 3.0. The lack of a 2.x path will mean that ATI users are left out in the cold and forced to stick with 1.1. The graphica quality will suffer a little, or at least until ATI pitches up with 3.0 hardware. The use of two different models highlights the big differences hat the specifications can make. The 1.1 path in SCCT allows for transparent materials, real-time reflections, filtered soft shadows, specular lighting and procedural animated texturing. However, the 3.0 path also allows for parallax mapping, enhanced filtered soft shadows, HDR lighting, high-precision rendering and an advanced skin shader for subsurface scattering. What do these features mean? Well, just enabling the 3.0 path will give you a performance improvement over the 1.1 path, assuming identical image quality. Adding in 3.0-specific graphical features will increase image quality at the cost of performane. For example, parallax mapping is a form of displacement mapping. It allows for textures to be given the appearance of height by allowing the use of a parallax distortion alongside a height map laid on top of the texture. The soft shadows obviously allow for better-quality shading. This is partly achieved by having the 3.0 shadow shader use dynamic branching to execute more quickly (dynamic branching is part of the 3.0 spec). Subsurface scattering is a way of rendering the partial translucency of a surface like skin, by showing how the light plays under the surface. It can lead to jaw-dropping effects and is often used well on characters in a game. The higher-precision rendering prevents the colour banding that can be seen, with more precision meaning better colour reproduction. HardwareWhat about the hardware? Well, we've already touched on some of the differences between ATI and Nvidia. Nvidia was quick to promote SM 3.0 with the launch of its 6-series cards last year, and while we've had to wait for games to take advantage of the full capabilities, the time where it's now becoming a must-have for the hardcore gamer is almost here. Of course, ATI has known that all along, and whilst sticking to the line that 2.x is plenty good enough, it knows that 3.0 is inevitable - hence why R520, its next-generation architecture, will certainly be 3.0 compliant. There are added complications. For example, the GeForce FX architecture, whilst SM 2.0 compliant, gave a little bit more on top, allowing developers to code almost proprietary code when needed to compensate for the performance the FX lacked. ATI has stalwartly stood by the 2.0b shader standard, which has meant that games developers have had to code for 1.1, 2.0b and 3.0 to fully support the range of hardware on the market. As evidenced by Ubisoft's straight 1.1 and 3.0 approach, it looks as if 2.0 is dead from here on, with 1.1 being the legacy path. This is exacerbated by the fact that the Xbox is 1.1 and the Xbox 360 is 3.0 - 2.x isn't anywhere on the console scene, a scene crucial to the money-making capabilities of most game studios. There are differences of opinion as to how hardware is going to evolve as the shader architecture and specification continue to develop. The box below (WGF RAW) discusses the fact that the Windows Graphics Foundation is going to be the next major iteration of DirectX. Crucially, WGF calls for a unified specification for pixel and vertex shaders, so the two can be used interchangeably at a software level. Interviews with experts along with some best guesses suggest that ATI intends to unify the two at a hardware level too, to provide for a faster, sleeker, more streamlined rendering interfance, and to prevent a situation - as we often have today - where vertex shaders are practically unused, underloaded and twiddling their thumbs, whilst pixel shaders work like crazy. This is thought to be the approach the Xbox 360 will take to. However, at least part of the reason Nvidia didn't sign on to develop the Xbox 360 was because of a difference of opinion as to how the architecture should move forward. Nvidia doesn't appear to be keen on unifying pixel and vertex shaders, and its decision to work with Sony on the Playstation 3 appears to have been a product of that, to some degree. Which company is right we won't really know until Longhorn goes on sale, and that could take a good long while yet,with its date still set for some time (any time) in 2006. Whatever happens with Longhorn, there is at least some stability for the next year. With both graphics companies supporting SM 3.0, and no prospect of another revision to the spec for at least another year, developers can finally focus their efforts on maximising the technology at their fingertips rather than constantly scrabbling to work out what's coming next. WGF RAW
Windows Graphic Founation (WGF) is the next major release of DirectX. It will bring about some changes regarding how shaders and the entire 3D architecture is handled in Windows. Over the course of the evolution from 2.0, 2.x and 3.0 of the pixel and vertex shader models, the abilities of pixel and vertex shaders have become very similar. Originally, pixel shaders lacked the functionality and complexity of vertex shaders. Under WGF, shader models are identical,and this identical specification makes the unification of pixel and vertex pipelines possible in hardware. This unification allows a couple of other fringe benefits. Texturing, a pixel shader function, can be done inside the vertex shader, making displacement map operations - where a pixel-based texture is extruded to give vertex-based height - quicker, because data doesn't have to be sent back and forth between the texture and vertex units. New functions for dealing with integral numbers also make for new hardware configurations possible, though not required. Currently, the only type of memory addressing that can be done between the GPU and its memory is a texture lookup, which uses a floating point value. By introducing integers into memory lookups, more precision is gained, enabling greater flexibility in storing graphics data in places such as virtual memory or main system memory. The use of virtual video memory addressed with these new integer functions - in the same way that a processor uses virtual memory today - allows for shaders of unlimited instruction length (in theory). this does away with the maximum instruction length, because the only restriction on the shader size will be the limit on the virtual space allotted for the graphics memory. This should make for even more amazing graphical features and extra speed. Currently, long shader routines have to be broken up into routines that fit inside the shader length as specified. By having just one long shader, rather than lots of shorter ones, there's less performance overhead and more code simplicity, resulting in better performance. PC Extreme magazine is available monthly: http://www.livepublishing.co.uk/pcextreme/ PC Extreme - Special Subscription Offer
Our friends over at Live Publishing have got a great offer on at the moment for new subscribers to their monthly PC Extreme magazine. Packed with all the latest news and features surrounding performance computing, modding, hacking, gaming, geek culture and more, you can get your monthly slice of action for a lot less dosh! UK Subscribers - 4 Issues for only £9.99 (inc. postage) UK Subscribers - 12 Issues for only £59.88 + FREE USB Flash Drive More Offers for non-UK Readers Subscribe now: http://www.livepublishing.co.uk/pcextreme/pcxsubs.shtml PanPan 3D: PanPan in the Wonder Land Exclusive
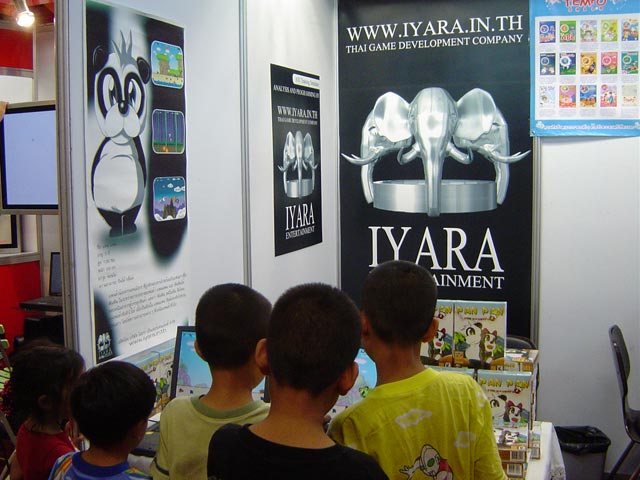
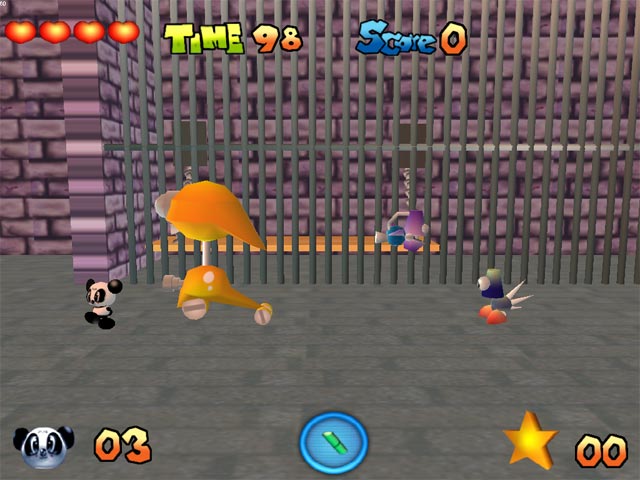
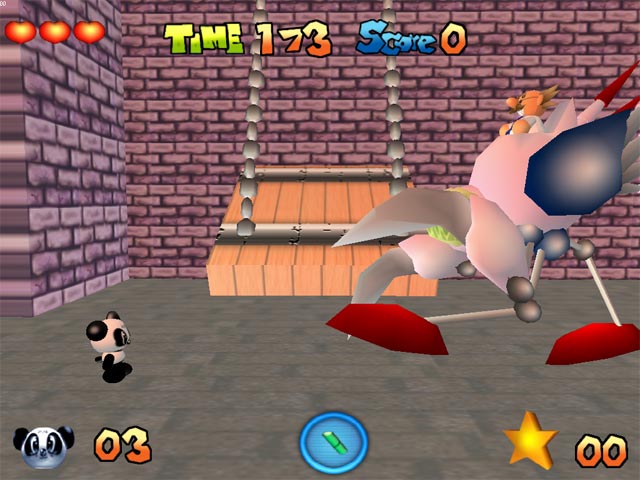
Bouncing its way very soon onto store shelves in Thailand is a brand new 3D platform action game called Pan Pan 3D: PanPan in the Wonder Land by Iyara Entertainment and published by Let's Play Interactive. The game recently debuted at the Bangkok Game Show 2005 to much critical acclaim, and we talk to PanPan's lead developer Wasin Pirom about his new title. 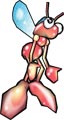
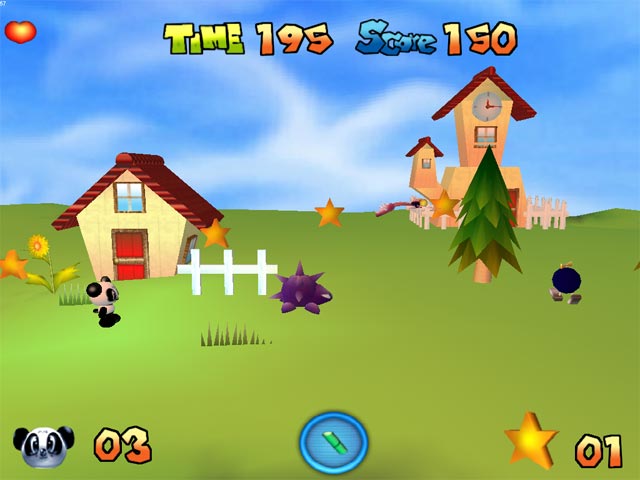
"PanPan is a cute little Panda who lives in the world of Wonder Land. One day while the Panda went out to play outside of his village the crazy evil Professor Ting-Tong arrived and captured the other animals, including PanPans friends, for his robot-building experiments. Upon his return PanPan found his entire village swamped with robots and cyborgs and his friends gone. So off he goes in search of the cause of this disaster." If the plot may sound like it's aimed at the younger generation of players there is a good reason for this: "In Thailand computer games, which are mostly all imported from other countries, are very popular. But almost all of them are pirated due to their expense for the average Thai gamer. Moreover, games for little kids can rarely be found these days. That is why we created "PANPAN the Adventure" back in 2004. This was a 2D action game and was very well received and a best seller, but for 2005 it was time to give PanPan a new appearance and bring the world alive in true 3D." "When we made PanPan and his world into 3D models we had to ensure they were still suitable for everyone, players of all ages. Although the game is in 3D we keep the angle of the screen fixed in order to avoid dazzling or confusing younger players, and we have found that a 3-year old child can easily play this game. They really seem to like it because it's not complicated and because of the colourful graphics and non-violent style."
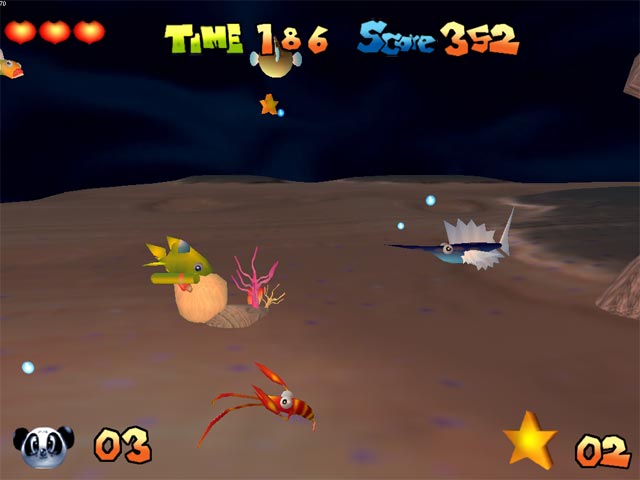
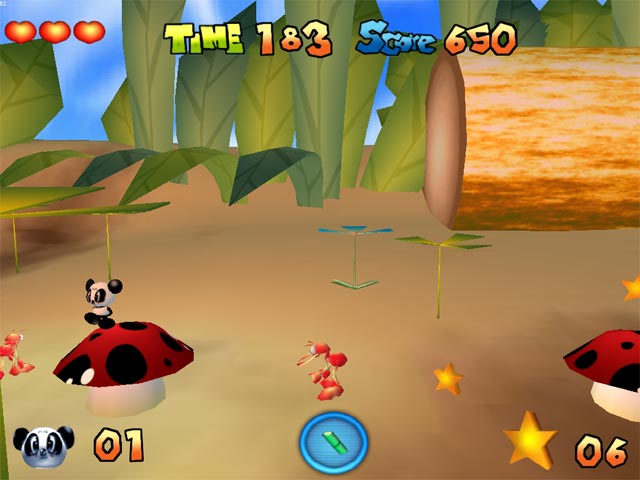
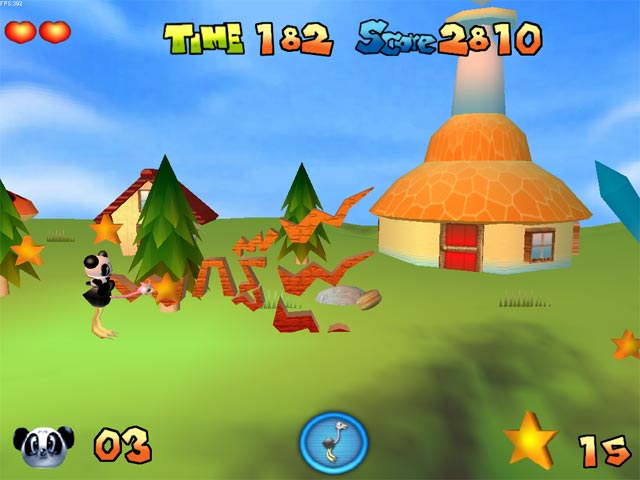
"In the new game players take on the role of PanPan and travel through 4 worlds including submarine world and insect world. Each world contains many sub-stages and an end-of-world boss waiting for you. There are more than 60 cute little enemies that you will enjoy fighting by throwing pieces of bamboo or collected weapons (such as hammers) at them. Also if you find PanPans friend Kokie the ostrich you can jump onto his back and ride him across the level, where he will help fight."
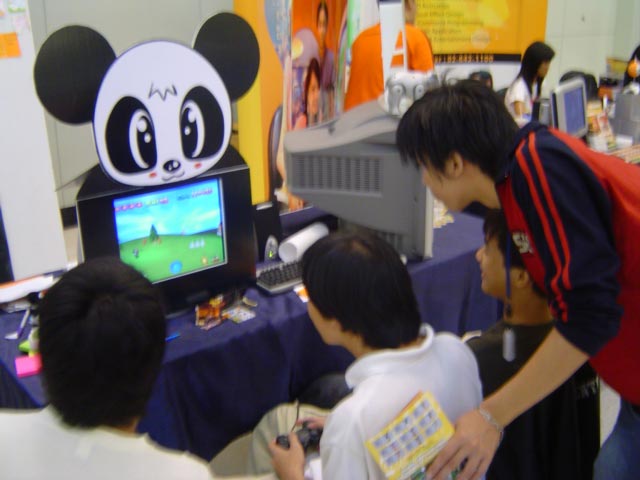
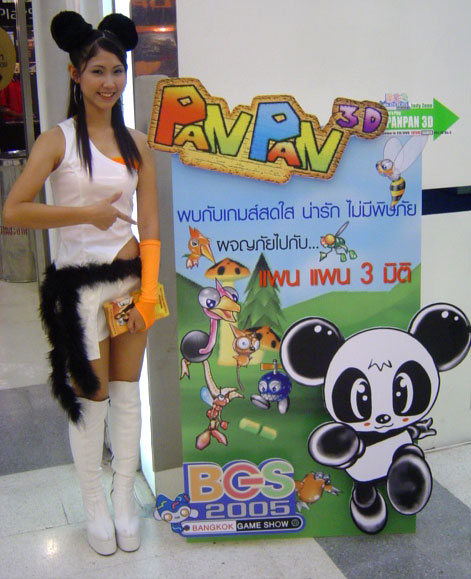
Here at TGC we were lucky enough to play an extended demo of PanPan3D and can confirm that even dispite the relatively low age-range of its target market, it's great fun! Each level offers something new, from piloting a submarine to charging around on Kokies back. There are an impressive 60 characters, 50 levels and 5 massive end-of-level bosses. Created by Wachirawoot Tacommie and Wasin Pirom the team created the entire game with DarkBASIC Professional for all of the code and MilkShape3D for character design. The full version has shadows, pixel shader effects and other techniques pulled from DirectX9 via DarkBASIC Professional. 3D Sound and cut-scenes before the play help create an interesting and advanced game. 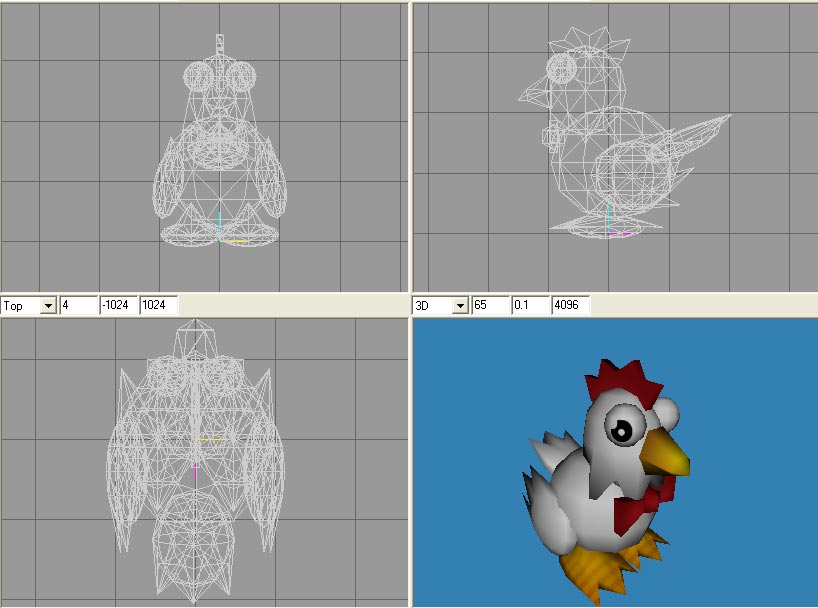 Just as E3 has their own selection of attractive females helping to perk interest from the passers-by, it isn't alone. Similar "sales techniques" can be seen at trade shows world-wide - even PanPan had his own PR girl at the Bangkok Game Show, the lovely Bow:
We wish the team all the best for their title, which will be officially released in Thailand later this Summer. More details (in Thai) at: http://www.iyara.in.th DBPro Tutorial - Self-Contained CodeExams, beach towels laid out at dawn, and realising I left a piece of mouthwatering pizza in the box the night before. These are just 3 examples of things I hope I never encounter again in my life. And often, even though the fruits of your labour are out of this world, you are glad your code is complete and the development nightmare is over. Wouldn't it be fantastic if all of the effort could be simply dropped into your next project, and you reaped the rewards of your trials and tribulations again? Over the past three months we have built up a small arsenal of useful techniques: Functions - creating isolated sections of code, used for repetitive tasks, or tasks that are best kept self-contained. Assets - keeping game assets, such as characters and vehicles, in good shape through the use of arrays. Scalability - the ability to shrink and grow our library of assets by using dynamic arrays. Variation - using the same Type to define variations of our assets. For example, all monsters have limbs, but each species may have a different number. Maintaining these in one Type allows generic code, or functions, to control each species. Blueprints - defining the basic building blocks of our program in easy-to-handle structures. Blueprints can also contain the "static" elements for reference; for example, the size of every Mini is identical and need not be recorded against each copy. 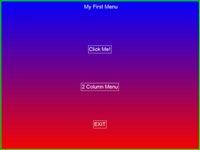
This month we are going to reinforce the concept of self-contained, reusable code, and add a layer of "protection" to our already overwhelmed senses. At the same time, we'll use a different example again to broaden our ability to apply all of these techniques to another important element of games - The Menu. Each command in Dark Basic is essentially self-contained, reusable code. When you make a cube, the command triggers a complex sequence of events that result in you seeing a cube by entering just one line of code. The cube command also accepts parameters in order to customise the command and the result. We can emulate this process. We can write functions with parameters, and trigger complex scenarios time and time again. These functions will access Variables, Types and Arrays, but if designed correctly we will never have to expose ourselves to the complicated data structures that support our functions. It is the supporting data that will start the development of our menu system. This is a simple text-based system, but it will be easily modified to create more elaborate menus. Here are the elements we need to create: System: details of menu style, state of the menu system, and where the user is. 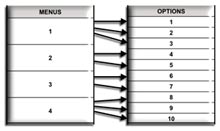
This data will be supported by System, Menu and Option Types. The Menu and Option types will form arrays, to allow a scalable solution to be implemented. We can create multiple menus, with multiple options. We only need one array of options, rather than one array per menu, because we can associate the option to the menu by the unique Menu Id. We cannot determine the programmer's requirements in each project, so we must enforce a design that allows scalability, even though it may create a little more work at this stage. The next step is to create the functions that will support our Menu System: InitMenu(): If we want to hide the data structures, we must ensure they are created by our Menu System. Dimensioning arrays only happens by executing the code statements, we cannot declare them globally and expect them to be created. An initislisation routine is also essential to create default variable values. Looking back at our racing code last month, we would also want to create our blueprints. MakeMenu(): This function will make one menu. It will add it to a dynamic array of menus, and apply the required values. We will supply these values as parameters. In order to refer to the menu later, the programmer will need to know it's unique identifier. We will return this value from the function. MakeOption(): This function will make one option. It will be associated with a menu, and once again we will customise it by passing the details in by parameters. ShowMenu(): To actually display a menu, we will use a simple function. The programmer, by using this one function, can pass control over to our self-contained system. In return, he will receive a value which represents the option taken by the user. Personally, I'm a lazy programmer. I tell people I'm efficient, but I admit I'm kidding myself. I'm going to add some more "helper" functions. You may recognise these techniques from the standard Dark Basic commands. SetMenu(): This function will allow the user to set the current menu being processed. The Menu functions will also use the same function internally. For example, when a menu is created we will SetMenu() to make it the currently active menu. The net result is that we do not need to pass the Menu Id in any of our functions, the "System" is managing the process for us. ClearMenu(): Rather than the programmer having to make many calls to delete options, and finally the menu, one function will handle this. You can see all six of these functions, and the supporting data structures in the downloadable sample code. Much of the logic and menu handling code has not been covered in any detail in the tutorials, but this emphasises the point. At the end of this session, you will be able to create a simple text menu without actually having to understand the underlying code, or recall how the data relationships are formed. We are now ready to implement our menu. Here are some examples of how we would acheive this in our programs: Make a Menu - requires a title, number of columns on the screen, and the first sprite to allocate: Set the Active Menu - The Active Menu will receive newly created options, and be displayed when requested. Make an Option - requires a title, and the value to return when this option is selected. The option will be added to the Active Menu. Run the Menu - requires no parameters, as the system knows the current menu. It will return the option selected by the user. The sample code shows the self-contained menu system as an include to a larger project. It has 2 menus, one single column, and one 2-column menu. The options will allow navigation between menus, trigger other functions and allow us to exit the program. You can see how the menu system handles the creation, display and interaction, and the programmer handles the user's requests. Another advantage of this approach is that more than one programmer can work on the same project. All that needs to be shared is the "Interface", which in our case is the functions and their parameters. This menu system is very basic, but will suffice for testing. I can now continue to develop a much more impressive menu system, and as long as the interface doesn't change, the include file can simply be replaced in order to implement the newer version. We have just stepped into the realms of project management, and a whole new world of possibilities. Now please excuse me while I return to my sun lounger, finish my pizza, and get some revision done. Until next time, happy Coding! Note: This tutorial has been packaged up into a nice friendly installer that will load a full-length version of the tutorial, along with DBPro source code into your Start Menu (in The Game Creators program group). Each month this collection will build-up into a formidable free resource. Download this tutorial + code: DBPro_June_Tutorial.exe Exclusive Newsletter Issue 30 Demo from geecee3! In order to mark the 30th issue of the TGC Newsletter we asked Grant Clark (aka geecee3) to come up with a little technical demo in order to celebrate this event - which is exactly what he's done! A great stomping looping soundtrack, explosive colourful visuals, scrolling text, bouncing space invaders and all of the newsletter covers from all 30 issues zooming along the screen make for an impressive demo! The full source code and DBPro project file is included so you can dissect the code and learn some graphical tricks of the trade. Our thanks go to Grant for this great demo and to our readership -- without you guys there would be no newsletter! Download the Issue 30 demo: http://files.thegamecreators.com/showcase/dbpro/intro030.zip (5.78MB) Coders Workshop Meet 3Saturday 16th July 2005 - 5.00pm till 11.00pm Doncaster, UK. 'Coders Workshop' is a multi language, multi platform convention for independent games programmers, designers and artists. This is the 3rd event held with much success. It is completely free to attend, and whilst aimed for independent, hobbiest and freelance game designers, there will be professional publicists and developers for you to talk too, ask questions and network with. Anyone is welcome, from novices to experts. The whole event is informal and designed to be fun as well as enlightening. Photos are available from CW2 on the web site (URL below). Quite a few Dark Basic members attended last time (including DBPro developer Lee Bamber) and it was a great night. If you are intending to come please email george at idigicon dot com (just for a head count) and tell him you read about it in the TGC newsletter. More details here: http://codersworkshop.com/viewarticle.php?id=11 Omega Basic News SpotOmega Basic is a programming language created specifically for building games and applications that work on mobile devices (mobile phones, PDAs, PocketPCs, etc). This month we bring you news about Omega Basic development and a new Tutorial. Chinese translation now available Windows Virtual Machine coming 1st July Omega Basic is available to buy now for only $59.95 (€45.99, £32.99) Omega Basic Tutorial - Building a Platform Game, Part 1Welcome to the first Omega Basic tutorial. This is designed to get you up to speed with Omega Basic without being bogged down with the boring bits. By the end of the tutorial you will understand Omega Basic's syntax, as well as having a simple platformer to experiment with and improve from following tutorials. To get started you will need to download Omega Basic which is available on the Omega Basic download page. Once Omega Basic is installed you a free to use all of its features, as long as your line count does not exceed 250 lines. This is simply a limitation of the trial version. When you first start Omega Basic you may be put off by the large amount of code already written in the editor. We have provided a skeleton program which allows you to dive straight into your program without worrying what happens when the phone rings in the middle of your game, or someone sends you a funny picture during an important part of a game. So, to start of with I am going to explain the basic structure of an Omega Basic program, and rid you of that scared look on your face :) Note: The source in the editor will look different as it is commented.
Phew, after that explanation I understand if your eyes are rolling in circles. But, don't worry, the hardest stuff is behind us, now you understand the way Omega Basic handles your source code we can now move on to making something interesting. I will try and move over the theory are quickly as possible, because although boring is needed so that you know what exactly we are doing. Then I will introduce the problems and the code to solve them. We are going to be making the basics of a platformer, I would have liked to have progressed further this month, but I am quickly running out of room, and so you will have to wait..sorry! Ok, so our platformer is going to be made of some nice grass, our hero and the evil enemy. The enemy is going to be automatically walking around looking for trouble, while the hero is under the control of the user. We are going to need some variables to get everything working, and so here we go. Click here to view the source code The lines that begin with Rem are comments, and are therefore there to help explain what is going on. The Dim keyword is used to create a variable; variable names that end with $ denote that it is a string. Right, we have some variables, now let's make it more colourful with some images. Click here to view the source code As you can see, we need to surround everything in with Try..EndTry. This is because Omega Basic provides as much flexibility to the user as possible. Instead of Omega Basic giving your users some obscure error you are free to handle errors in your own way! We are dealing with files here are we load the images from the image files, and so need to catch any IO (Input/Output) errors. Once we have the images loaded we can do fancy things such as make animations, set frames and create arrays of sprites. Creating arrays of sprites is a cool little time saver, which allows you to pop any number of identical sprites into an array. Imagine not having this functionality when creating space invaders...ouch! Next up is the main function, now as this handles lots of code I am going to break it down into the actions, and then write commentary between these. If you want to copy and paste the code then don't copy my comments otherwise you will end up with the compiler spitting out all sorts of crazy errors. So, here is Paint action, which if you remember is where all the actual drawing is done! Click here to view the source code To keep things nice and neat I have split the action into a number of sections. First of all basic screen preparation is done, this includes painting the screen black and drawing some text on screen. I usually prefer to paste debug onto the screen than use the print command, however it is personal preference. When the basic tasks are finished we can then get the nice sprites on screen which gives a beautiful starting screen (Fig 1). With some simple sprite creation and painting we have drawn our scene that is shown when the game begins. If Omega Basic has now scared you silly then sit and admire your creation; while everyone read on! We need to save the day by making our hero walk around. 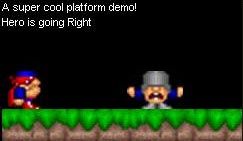 Fig 1. Next up is allowing the super hero to do something other than look forward, as this isn't going to save the day. Therefore we need to do something with the KeyPressed action which is going to let us press the right arrow to move right and the left arrow to move left. So first of all is let us set our variables we made before so that our engine knows how to draw our superhero. Click here to view the source code Now when we press left the heroDir$ variable is set to left, and when right is pressed heroDir$ becomes right. We now need to make our hero move, animate him to look that little bit more real and to make sure he doesn't walk off the screen. Tada.. Click here to view the source code Finally, to wrap up our adventure with Omega Basic we need to make our enemy do something more than just stare at us. A simple, but effective approach is to make him pace left and right, just stopping short of the hero and the right screen edge. So, here goes, you will notice that it is very similar to the hero movement, just that the enemy will automatically turn. Also notice that the enemy is controlled by the loop action that we learnt about; this ensures that the enemy will do his own thing without relying on anything else. Click here to view the source code I hope you have enjoyed my introduction to Omega Basic tutorial, in terms of flexibility and features I have only scratched the surface. Therefore next month expect to see something more interesting that what we did today. The full media and source is available below! Full source + Media: OmegaBasic_Tutorial_Platform_Part1.zip (150KB) Easy Level EditorEasy Level Editor is exactly that - a level editor for use with DarkBASIC Professional that allows you to easily create levels for your games or programs. There are two versions: Lite and Standard (Lite being the Free version) and it includes features such as: 
Screen shots + Download: http://www.easyleveleditor.com More Goodies from geecee3Last month we reported on a range of lovely freebies from geecee3 that you can use in your own games. This month there are yet more of them available!
By the way - if you were wondering how Grant managed to get hosting on the TGC web servers it's because we recognised the quality and amount of resources he was putting out and offered him the space for free. If you're doing something similar then why not drop us a line? Visit geecee3s site: http://members.thegamecreators.com/geecee3/ New DarkBASIC Professional DLLsA number of new DLLs for DarkBASIC Professional have caught our eye this month. Create 3D Text (D3D Functions DLL)Now this DLL from Cloggy is really cool - it lets you create 3D text objects from any Windows font. Just like the program Xara3D, except it's free ;) You could use it to create cool in-game menus or objects, or of course you would write a Xara3D beater with it :) (and if you do, let us know). Comes complete with manual, example files and sample code. Superb. Download (177KB) and contribute to the forum thread. Options Dialog DLLThis plugin (DLL) for DarkBASIC Professional allows you to create and use Option Screens and with similar code allows you to create a main-menu screen. Commands include: DrawOB (draw the dialog box onto the screen), DrawTitle (draw a title bar above the box), TitleClicked (returns a 1 if the title bar was clicked), DrawCommand (draws separate commands onto the options box) and more. A complete manual and example DBPro code is included in the free zipfile. More details here: http://forum.thegamecreators.com/?m=forum_view&t=55087&b=1 Bitmap Text Class (Dark Game SDK)Dark Game SDK user Shiny got a little fed up with seeing the standard monocolor default arial font in the Dark Game SDK programs, so created a class that displays text with a bitmap font. Naturaly you can edit the bitmap to look however you want making this quite a versatile and useful class. If you are interested in updates let Shiny know via the forum thread as it'll probably going to expand to include multiple lines of text, among other things. Info + Download: http://forum.thegamecreators.com/?m=forum_view&t=55024&b=22 From the ForumsOur forums are a diverse and interesting place to hang-out and here are a selection of hot topics this month.
Mr. Gordo: Pig in the City
Newton Tutorials
3D Web Viewer for DBPro Levels and Scenes
Dumbo and Cool Update
Where Game Designers go Wrong
Hypnotic Particles
Map Edit Version 0.2 Beta
Re-Ora Track You can find our forums at: http://forum.thegamecreators.com 20-Liner - StarFighter by RiiDii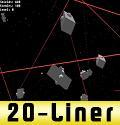
RiiDii has created a simple but fun 'space shooter' game. The goal is quite simply to take out as many enemy ships as possible with your lasers as they fire at you. Smooth control with the keyboard and mouse, above-average AI and fun generated graphics make it a blast to play. As always, share your scores with other forum members in the 20-liner thread! (Thanks to Ian for the review) The author of this 20-Liner has won any of the DBPro expansion packs, just email us to claim your prize. Download the 20-Line code from: http://forum.thegamecreators.com/?m=forum_view&t=55121&b=11 Dive-by 'Chuting
Well here's something a little different - This game is part of a fund-raising event. On Friday June 17th the games author Jonathan Gover will be taking part in a skydive for charity, the money from this game is going to go towards that. Half of the money will go towards the cost of the jump, the rest will go to charity. Once the skydive cost has been covered, all extra money will be going towards charity. The charity involved is Link Ukraine - this summer a group of students from Jonathans University (Warwick) are going out to work with them. For more info about Link Ukraine, see here. The object of the game is to drop skydivers from the plane and land them on the target, avoiding the clouds and helicopters on the way. You do this by creating gusts of wind to blow the skydivers around. There are several game modes: Arcade - Everything appears at random! Landing skydivers on the target will increase the time on the clock, game over is when the time runs out. Puzzle - Work your way through 40 levels. Click on the plane to drop the skydivers, the number of skydivers in the plane and the number that need to land for the level to be complete are displayed on the screen. Web Site: http://www.govergames.co.uk/index.php?page=divebychuting Beginners DBPro Tutorial - FPS AI & Menu by Michael ShahHello and welcome to a continuation of my tutorial series. In this tutorial, we're going to finish off our FPS game. This tutorial is jam packed with lots of new information, so lets not waste any time and get started now. What will be covered
What you need
Did you miss the last tutorial? In this tutorial, I'm going to show you how to build a simple Menu screen. To create a menu screen is as simple as creating another main loop for your menu, and then using a goto statement to bring you to the game code. Click here to view the source code Creating the waterMany times people make creating water a huge task, and this can result in overkill in both looks and system performance. For this tutorial, all we're going to do is make a plain. Sounds a little too easy, but by placing it in the terrain, we'll let the terrain create the smooth edges of the water for us. Also, by using an object for water (versus a matrix), we can apply reflections or even(for more advanced users) shaders. Lets keep things simple right now, and just get some decent looking water. Click here to view the source code Creating the Sky SphereA skysphere is an object textured that'll act as the sky. Skysphere's are created by using a sphere of a negative size(so the faces are flipped towards you) and then texturing it. Click here to view the source code Player VariablesAt this point and time, we need to assign some variables for our player. We'll need three variables, one for the health, a second for how many bullets we have in our round, and a third for how many rounds we have. Click here to view the source code Ammo Crates and CollisionBecause we can't have an unlimited supply of ammo, we'll need a way to get more. This will be as simple as randomly creating ammo boxes to place around the map. For collision it's important to understand that there's three types of collision detection.: Box, sphere, and polygon collision are the three DBPro natively supports. Since we're dealing with cubes, the obvious choice is to use box collision. If we have a ball, use sphere collision, any other shape, use polygon collision. To enable collision, all we have to do is 'set object collision on objnum' then choose the type of collision. The statement 'object collision(obj_a,obj_b)' is then used to return whether or not collision is occuring between two objects. See 'Collision detection' in our main loop, to uncover exactly how this is done. Click here to view the source code Artificial IntelligenceAlright, here's the big cheese of this months tutorial. We're going to breath life into our enemies so we can truly call this a game. There are so many ways to go about artificial intelligence, it's not even funny. The method I'm going to use, will be the simplest, and probably most effective for this tutorial. How will it work? Basically, there will be 5 dummy points placed on the map. One on each corner of the map, and the other on you! Using the random number function(rnd()), we'll tell the enemy which direction to head. (Note: Number 5 represents you!) 1---------2 | | | | | 5 | | | 4---------3 When the enemy reaches that point, we'll recall that random number function, and tell the enemy to head to a different waypoint. Shall that waypoint be you, or the enemy crosses paths with you on the way to its waypoint, it'll attack you. Attacks will be as simple as the enemy playing his(her?) animation, and you must of course shoot him. :) Sound simple enough? Lets create those dummy points right now. Click here to view the source code Now, we'll finally need an array to hold the distances that our enemies are from us. This will be used as another way to set waypoint 5 (the waypoint that represents us.) If the enemies are close enough, they'll automatically be set to this waypoint. Okay, the enemies now have the waypoint assigned, and the dummy objects have been created. See the "Artificial Intelligence" section in our main loop to see what we do with our enemies now. WeatherJust to spice things up a little, lets add some rain. The way this will work in our main loop, is we'll have these plains constantly falling and then reposition them back in the sky when they hit the ground. At this point, we'll also rotate them, so they're always facing our main character. This is a way to "cheat" at billboarding, and save processor power, by not constantly rotating everything towards the our character. Click here to view the source code Into The GameAfter everything has been set-up we need to prepare to start the game. This includes: Loading the Music, Creating all of the GUI graphics, Loading our custom mouse pointer and setting up Debug Text. With this finished we can start the real guts of the main loop performing the following tasks in the sequence presented here:
All of these tasks are performed over and over for every moment that the game is running. It is via a combination of the above events that we control what is happening in our game world. At this point it would be highly advisable to see the full source code to understand exactly what happens in each stage, as room is limited in the newsletter. Amazingly with all of this happening we actually have a fully functional, fast and playable FPS game! ClosingWe finally finished! Wow, you've just completed your first (or maybe millionth) First Person Shooter game. I hope this tutorial has provided you with some knowledge of how to code your own game, or perhaps you've learned a few tricks. If anything, I hope the game is at least fun for you all to play. And I bet, if you got rid of all my comments, we'd still be under 500 lines for a full game! :) Look forward to next months tutorial, as we're starting over again with something totally new! Contact: yellow1dbp at hotmail.com Download the Source + Tutorial: DBPro_June_Tutorial_Full_FPS.zip GameDev.net Four Elements IV ContestGameDev.net's most popular contest is back! Due to popular demand, we've brought back the beloved Four Elements contest, but this time we decided to make it more challenging - and more rewarding - than ever before. The Four Elements IV contest is about bringing back the spirit of gaming. After years of research, we determined that every successful game requires one of four elements: robots, pirates, ninjas, and zombies. So what better than a contest that combines them all! Your goal in the Four Elements IV contest is to take at least two of these four game elements and do what you do best: make a game! Sounds like fun, right? Well it gets even better! We have an amazing line up of sponsors for this contest, including ATI, Softimage, ionForge, Game Institute, Charles River Media, and that's we're just getting started. More Info: http://www.gamedev.net/community/contest/4e4/ Particle PlaygroundThis is a particle engine / editor called Particle Playground. Although you need the 3D Cloth and Particles pack for DarkBASIC Professional to use the saved source code of this program, anyone can actually play with the interface and see how it all works. It features:
More info: http://forum.thegamecreators.com/?m=forum_view&t=55903&b=8 This months winner
Each month we award one lucky subscriber a free copy of DarkBASIC Professional. The winner this month is: gordony@??????????.co.uk OutroJust like the superb Dr. Who TV series, this issue has come to an end for now -- and like the good Doctor, we will be returning once more to bring you the latest from the world of The Game Creators! Share your product / project news with over 12,000 active games developers! |
||||||||||||||||||||||||||||||||||||||||||||||||||||||||||||||||||


 Tileset Collection
 10 Skybox Textures