The Game Creators Newsletter Issue 29
As Rick (TGCs Commercial Director) prepared to jet off for a sunny break abroad he emailed the team, the email advised us to back-up our data to DVD and post them to him as part of our off-site backup policy. Sure enough the day after his email arrived things started to go "wrong" with my main work PC. Windows decided it didn't want to ever restart (it'd hang on a black screen), forcing a physical shutdown to be required culminating in XP blue-screening upon reboot several times in a row. That and my main hard drive was starting to make the sort of noises you expect from a cheesy horror movie when some unknown beast is scratching against a window pane. In the end I knew it was time for some serious PC rebuilding if I wanted to get anything done. A brand new 550W PSU, SATA boot drive and an extra GB of memory later and my PC is finally in a state where XP will install. The tedium of getting just the bare essentials back again was mind-numbing. Going through the motions for anti-virus software, SP2, card drivers, collections of fonts, browser fixes, my email client etc -- it all takes it toll eventually. While I didn't loose any data, having had it backed-up to both DVDs and external hard drives, the sheer amount of time it took to get a fully operational PC back again was staggering. So dear reader - if you're ever in the position where you've a newsletter to get finished and your boot drive is grating as badly as 13 new Big Brother contestants: don't ignore the signs. For those wondering why I didn't finish the newsletter on my Mac the reason is simple - all of the articles were sitting in email folders on the PC. C'est la vie! This is actually the May issue of the newsletter, despite only just managing to scrape in on time by the skin of its teeth. The main feature this issue is the release of Play Basic, a great programming language that will run on even the most humble of PCs, offering blistering 2D performance. Competitively priced and packed with features (and a great editor) we hope this one will go far. We've the usual round-up of articles including DBPro tutorials, PC Extreme, FPS Creator news, new games, forum gossip, another winning 20-Liner and more. While the newsletter may be late, it is at least finally here, and it's a monster read. Enjoy! I'm off to run a back-up. ContentsPuzzle Game Competition
We wanted to run a small game making competition for our members, something that you could sink your teeth into for a month or so, submit a game at the end of it and possibly win some prizes in the process. So we're pleased to announce our new Puzzle Game Compo. This is a mini competition meaning you get less time to create your entry, but the scope of the competition should be ample enough for anyone to give this a bash regardless of skill level. It's also a genre that lends itself well to 2D or 3D and where graphics don't have to play the major role. The deadline for the competition is Monday the 18th of July 2005 - here's what you need to do: The competition this time is to create a puzzle game. There are no set restrictions on what kind of puzzle game is allowed. It can be 2D or 3D. It could be a Tetris clone or a board game, whatever you end up creating it just has to be considered as a puzzle game by the masses - because this time around it is the community that will vote for the winner, not The Game Creators (we will of course cast our votes too, but they will hold the same weight as everyone else).
What exactly do I have to do in order to enter this competition? We are not looking for pixel-perfect clones of originals, we're looking for variations on popular themes and unique original puzzle elements. When it comes to voting each forum member will be allowed to place their vote for 3 games in order. The first game on their list will receive 6 points, the second will receive 4 points and the third will receive 2 points. These votes will be public and will be seen by everyone. At the end we'll count all the points up. To avoid people signing up new forum accounts specifically for this competition (to sway the votes) we'll discount any votes from forum members who have accounts newer than the 1st of July 2005.
The Prize List
So just to clarify - make a puzzle game and submit it before the deadline and if the community votes it high enough you may win some prizes :) More details: //www.thegamecreators.com/ Play Basic -- Bringing 2D games to life
Introduction
Give a caveman a computer...
Multiple Features One of the key fundamentals in many traditional 2D games are Tile Maps and controlling your characters around them, as seen in platform games and shoot'em ups for decades now. Play Basic gives you built in support for unlimited tile maps. These maps can have various draw modes, animation sequences and collisions as you'd expect. But the real beauty lies elsewhere, with the Camera System.
2D Camera System The camera system allows you to draw any graphical item (Text, Dots, Lines, Triangles, Boxes, Circles, Shapes, Maps, Sprites, etc) to what's called the scene buffer. Items in the scene buffer not only have a X and Y position, but they also have a depth. Using this information the camera can work out what's visible, and the correct order to draw everything in. Giving you the freedom to draw your graphics in any sequence you like, you then simply sit back and let the camera deal with it. Example 1 -- Depth Sorted Circles
; Create a Camera.  The Camera will attach itself it self to the screen by default.
CreateCamera 1

; Get the Screen width and height
sw=getScreenWidth() :sh=getScreenHeight()

; Start of DO/LOOP
Do

	; Tell PB to capture all incoming GFX commands to the SCENE BUFFER rather the draw them
	CaptureToScene

	; Clear the SCENE BUFFER
	ClsScene

	; Draw a group of depth sorted circles, these circles will rotate and be drawn in order to the viewer
    Number_Of_Circles=30
    For lp=0 to Number_Of_Circles
		; Calc angle and positon to draw this cricle at
		angle#=wrapangle(baseangle#,(lp*(360/Number_of_Circles)))
		X=Cos(angle#)*300
		y=sin(angle#)*150
		Z=500+(Sin(angle#)*300)
		pr=(300*128)/Z
		; Set the Current Depth.
		Capturedepth Z
		; Set the current ink colour (faded based upon depth)
		ink rgbfade($ff8f8f,16384/z)

		; Draw this filled circle (which will be capture to the scene buffer)
		circle (sw/2)+X,(getscreenheight()/3)-y,pr,1
	next

	Capturedepth 500

	; Draw a shaded pole right through the center of our rotating circles above.
	Shadebox (sw/2)-25,0,(sw/2),sh,rgb(0,0,0),rgb(0,255,0),rgb(0,255,0),rgb(0,0,0)
	Shadebox (sw/2),0,(sw/2)+25,sh,rgb(0,255,0),rgb(0,0,0),rgb(0,0,0),rgb(0,255,0)

	; Draw the camera.  This will process all the gfx items in the scene buffer and draw them for us
	drawcamera 1

	; Change and wrap the BaseAngle  variable to a value between 0 and 360
	BaseAngle#=wrapangle(BaseAngle#,1)

	; Show The Screen
  Sync
loop
The camera is most commonly used in scrolling games (it can also be used to simulate depth as seen in the Software 3D demo). Since it allows the programmer to forget about calculating what is visible and just focus on moving the sprites around. For example in order to make the camera follow the player in scrolling world we simply set the camera to the players position and it does the rest. Example 2 -- Simple Inner Loop CodeDo ; Tell PB to Capture the following GFX commansd to the scene buffer CaptureToScene ClsScene ; Set the capture depth and draw a tile map at posiiton 0,0 is world space Capturedepth 100 drawmap 1,1,0,0 ; Move the player sprite using the Arrow keys if leftkey() then movesprite Player,-5,0 if rightkey() then movesprite Player,5,0 if upkey() then movesprite Player,0,-5 if downkey() then movesprite Player,0,-10 ; Position and center the camera around the player sprites position. positioncamera 1,GetSpritex(player)-(GetScreenWidth()/2),getSpriteY(player)-(GetScreenHeight()/2) ; Draw player DrawAllSprites ; Draw the camera and Show the screen Drawcamera 1 Sync loop While mapping is one part of the puzzle, sprites and other native graphic commands make up another part. Graphically you can Rotate, Scale, Alpha blend and Shade images and sprites. Not only that, but you can even apply blending modes to traditional vector graphic commands like Dots, Line, Circle, Ellipse, Box, Triangles and Quads. Getting away from the graphic engine features, the language itself has been designed to be faithful with familiar basic conventions while expanding upon them also. For DarkBASIC users it shares many common syntax similarities with, so most 2D DB/DBpro programs can be ported fairly easily. Although it's worth noting that Play Basic is a fairly strict basic. A lot of effort has gone into making the compiler and runtime as safe as possible!
Core Data Management To complement the compiler we've built in a robust runtime debugger. The debugger features the normal runtime monitors you'd expect including halt / step / trace, through to variable and array monitoring and a built-in console. However one of the best features is that instead of running your entire program in debug mode, you can selectively enable debug monitoring for certainly parts of your program. Allowing you to debug new code in record speed. Well, we better leave it there. Thanks for reading, and while we haven't really scratched the surface of Play Basic, hopefully this introduction can give readers some insight into how Play Basic is evolving for them. Play Basic is on sale now for $34.95 Web Site: //www.thegamecreators.com/ Code a Winning Competition GameCompetition Entry Advice: We've been running programming competitions on The Game Creators web site for many years now, from the early "multi player" and "ski game" compos" to the more recent Retro Game and Alienware events. Here is a collection of hints and tips, things you should bear in mind while carefully crafting your entry.
Test, Test, Test!
Don't get too hung-up over the small details
Never assume we'll know how to play your game
Watch the difficulty factor
First impressions do count
Have fun. This isn't an exam More details: //www.thegamecreators.com/ FPS Creator NewsMulti Player BeckonsAround 4pm each day over the past months the TGC team get together on-line to test the latest FPSC multi-player builds. At first all we could see were our names floating around in blackness.. then it progressed to being small yellow sticks that rotated around a 3D map. As Lee honed the networking functions making them faster and less laggy, we finally got to play an actual FPSC game on-line -- 4 players charging around the arena blowing the crud out of each other! There are various considerations you'll have to allow for when designing your multi player arenas - vast open areas will increase lag, and overly powerful weapons will make the games short-lived and frustrating. But get the arena balance correct, with well thought out corridors, dark areas and plenty of places to hide / snipe from, and you'll manage to create a good fun on-line experience. Screen Shot Compo ResultsDuring the months of March and April we ran a screen shot competition. Money prizes were up for grabs for those entering the best quality screen shots taken from FPS Creator built games. In the end we had over 300 shots submitted and you can see the winners on the FPS Creator web site by following the links below:
Click here for the April winners Fan Web Site UpdateThere's only really one major FPSC fan web site out there at the moment - FPS Creators.com, but it's recently had a decent face-lift, stacks of new features added to it and new resources made available. Users can now rate the resources directly, discuss them and upload even larger files than before. Check out the site here: http://fpscreators.com FPS Creator EA Release is available to buy now for only $56 (€43, £30) with a heavily discounted upgrade path to Version 1 when released this Summer. More details here: //www.thegamecreators.com/?m=view_product&id=2001 PC Extreme - Graphics Card Workshop - Graphics Card Branding 
Each month the tech gurus over at PC Extreme magazine delve into a current or emerging PC technology, always with a gaming / development related theme. This month: Confused by graphics card branding? Wil Harris takes out his machete and hacks through the jungle of marketing hype. The PC graphics market is crowded but interesting. While there are only a handful of major graphics firms who have an impact on the market segment, between them they produce enough different products to bamboozle even the most hardened graphics expert. What's going on with LE, SE and XT extensions? What makes one 6600 card different from another? This month we're going to investigate the complicated, scary and frankly confusing world of computer graphics SKUs.
Discrete Whilst all PCs require a graphics output device of some sort, not all PCs come with individual graphics cards. With chipsets like the Intel 915G or ATI Radeon Xpress 200, graphics cards can be built right onto the motherboard. Usually a VGA port is added to the backplate, next to the USB sockets and printer port. According to Jon Peddie Research, these integrated graphics solutions account for 56% of all graphics devices sold. In other words, discrete graphics boards - those that plug into an AGP or PCI-Express slot - make up only 44% of the overall market. This is because, across the market for new PCs (including many office users), people tend to buy their PCs with integrated graphics and never trade up. Don't think this situation is set to change - new PCs continue to ship with integrated graphics in the vast majority of cases. However, despite the lower figure for discrete card sales, it does mean that there is a market of roughly 110 million discrete graphics devices to be shipped each year, with a proportion of those being to PC builders and a smaller proportion going straight to end users for home upgrades. Within the discrete graphics segment, there are a number of sub-sectors which define where different SKUs can be found. These are normally referred to as low-end, mid-range and high-end, and the products that fit into these categories do so based on the performance they offer as well as what they cost. As you would expect, the low-end sector is made up of cards with a low performance and low cost, whereas the high-end sector contains expensive and high-performance cards. The mid-range is where most of the money is made. These cards are often good performers at good prices. The mid-range sector makes up the bulk of off-the-shelf graphics card sales, in fact. Where the confusion starts to occur is when products cross the lines between the sectors. A previously high-end product may be remarketed as a mid-range product when a new chipset is introduced. Additionally, product names may be decided upon in order to confuse customers into thinking a mid-range product is high-end. Arrggh! The tricks these marketing people get up to!
Competition The mid-range is fought over because it's where the majority of average punters spend their money. Whilst high-end cards can cost £400, mid-range cards cost £100 - £200, which is considered a sweet spot for the consumer. If the performance is compelling, users might be persuaded to spend a little more, but generally, the fight is to get the fastest card under £200. The low-end is contested because it's attractive to PC system builders. Because competition in the PC market is so fierce, system builders like Evesham or Mesh are keen to keep the cost of their machines down. Adding in £400 graphics cards isn't an option. However, they also need to appear to give good value and branded add-in graphics can be a good way to do so. If a customer is offered a machine with Intel integrated graphics or one with "Nvidia 6-series graphics" for £30 more, chances are that they'll go for that one (provided they've had a little education along the way). There are huge amounts of sales to be had from the low-end, even though the profits might be slim. Jon Peddie Research produces a quarterly newsletter called MarketWatch, which sums up all the information collated by the firm about the state of sales in the graphics market. According to their Q4 2004 newsletter, here's how the graphics market looks as a whole:
Naming Conventions Complications can occur because these different endings aren't always sensible or immediately logical. Is an XT better than an XT PE? What about a Pro? The confusion increases when competitors use and abuse their competitor's abbreviations. Last year, ATI's top end product was a Radeon 9800, and the high-performance model was the 9800XT. Nvidia had the 5900 in competition, but its mid-range model was the 5900XT. XT came to mean different things across the brands, and confusion ensued. OEM SKUs should also be added into the mix. OEM stands for Original Equipment Manufacturer and generally refers to PC builders. To try and hit specific markets or price points for these clients, graphics firms will build custom versions of their cards and chips that aren't made available to the general public. Examples of this include the 6800LE and the X800 SE. These products are occasionally different in key ways, but generally they simply add more complexity to a range. Crafty manufacturers or board vendors will even get these products out into the mainstream at some point, so while the card is very specifically targeted at a certain OEM market, it can look out of place or underpowered in the main market. Are all those abbreviations applied the end of graphics card models driving you crazy? Here's our quick guide to what beats what on both sides of the divide.
ATI: XT PE beats XT beats XL beats Pro beats no ending beats SE.
Substantial list of caveats: Watch out for cards that are exactly the same bar the memory configuration and make sure that the memory amount you are buying is suitable for the card! Buying a 256MB 6200 card is worthless and will certainly not give you more performance than a 128MB 6600 card. Companies selling these bizarre configurations rely on people thinking that more RAM is always better. Understand the limitations of the overall chipset to know where performance limitations lie! Be aware that companies will release cards to journalists that may never make it into the public's hands (although the magazines and websites aren't aware of this at the time, of course). These cards are generally just for publicity and if they ever do make it to retail, it is in very, very small quantities (see the original X800 XT PE and the X700 XT).
SKU Flood However, a reduced price then puts the card into competition with another product - a drop to, say, £180, will put it in direct competition with the X700 Pro, which is around £160. With four more pipelines and better clockspeeds, putting down the extra £20 is going to be a no-brainer for most punters. An event that can also happen is aggressive product introductions from rivals. The 6800 GT positively walked all over the X800 Pro around six months ago, so earlier this year ATI introduced the X800 XL, which is a GT beater in most instances and comes in cheaper. At the time of writing, a price reduction is expected on the GT, but this will bring it closer to the 6600 GT card, which has been priced appropriately for the market it came into. You can see how the situation gets complicated!
Niche Markets There's another niche too. Cards with system memory technology, such as Nvidia's Turbocache and ATI's Hypermemory, sit very close to other low-end models, but depend on different factors for performance. A large amount of PC RAM is required for optimal performance but this will mean the card then blows the socks off the competition at the same price point. In other words, the value of these cards depends more on the other components in the PC system than anything else.
Conclusions Amazed at the different amount of products out there? The table below might help. We've left out OEM products but what we have put in there is a list of all the current SKUs from Nvidia and ATI, along with a comparison of how they line up. Compare closely! ATI
NVIDIA
PC Extreme magazine is available monthly: http://www.livepublishing.co.uk/pcextreme/ MIDI Output DLLWe received this email from David Sam about a new MIDI output DLL he has created for DarkBASIC Professional. If you ever wanted to use DBPro to handle MIDI instruments - this is your route in: "This dll is a simple dll I used to create a Music Synthesizing program. It has three simple functions, all of which can be called with CALL DLL. openMIDI (used to initiate a MIDI output handle [which is stored internally, this solves the problem of needing to pass a reference parameter to the winmm function as this can't be done in DarkBASIC Professional] and returns the status), closeMIDI (to close the port), and sm (which packs a standard small midi message and outputs it to the port). You could use this dll to create a piano or synthesizer for example. There is a demo program that includes a few DarkBASIC Professional functions such as noteOn and noteOff that simplify the dll calls. You can download the Synthesizer demo and DLL from Davids web site. More details here: http://www.freewebtown.com/rioplata/ BBC Gameplan Competition (UK only)
Are you a game playing wizard? Do you know how to have fun? Are you aged 13-19 years old? Come up with an idea for your dream game with characters, scenes and a story and you could win some great prizes. The top prize is to see your dream web game turned into a reality for the Blast and Teens websites. The competition deadline is 5pm on Friday 15 July 2005. Your task is to come up with a great idea for an online game inspired by art, film, music, writing or dance. We're looking for a game offering about 5-10 minutes of game play. The winning game will be made using Flash. You don't need technical or illustrative skills to take part but you do need to be passionate about games. One lucky winner will get their game made for the Blast and Teens websites and have the chance to help us make it. Runners-up will get expert feedback and have their ideas showcased online. Games legend Peter Molyneux is judging the entries. More details: http://www.bbc.co.uk/blast/opportunities/gameplan/comp.shtml DBPro Tutorial - Scalable Assets and Asset TemplatesNote: You might want to refer back to the previous tutorials, as this builds on what we have already learnt about Functions, Types, Arrays and managing assets. They say Rome wasn't built in a day. I blame bad planning, and a distinct lack of a scalable solution. The leap we are going to take from last months Asset Management tutorial is going to be huge, but at the same time very manageable. Last time, we built 2 armies of 10 aliens. In this article, we will take the same techniques a step further. By the end of this tutorial we will have the ability to: Build an inventory of any size. While reading, bear in mind that the techniques can be applied to anything that you require more than one of. You can adapt the concepts to cars in a race, power-ups in a platform game or gamblers around a game of poker. DarkBASIC Professional implements a concept called dynamic arrays. Quite simply, this allows you to shrink and grow the number of elements in the array at will. Why is this important? To take it to the extreme, consider the example of a city simulation, where you need to account for the population. You may start with 100 citizens, but need to build in the ability to expand your city to 1,000,000 dwellers or more. It is important to allow the user to control their experience, and not prevent less capable computers from running your game in order to accommodate the power-users. To create a dynamic array, simply exclude the dimension parameter. This month, I'm going to build vehicles. The full source code is available in the downloadable install file. Dim MyVehicles() as tVehicle Before we can create a vehicle, we must add an element to accommodate it: Add To Queue(MyVehicles()) There are other ways to add new elements, they can be found in the help files. The method used here ensures the new element is added as the last one in the array. The new element automatically becomes the current one. So we can populate it without having to know what the element number is:
MyVehicles().name$ = "Boy racer" Now we have the ability to build an inventory of any size, we need to think about making the process easier. I want 4 different vehicle types in my system, and so, just like a production line, I'm going to create blueprints for each vehicle type. Not being a mechanic, I'm going to keep it simple.
Once again, we have 4 distinct assets, vehicles this time, sharing the same characteristics. Consequently, we can store all of our blueprints in one array. Check the source code to see the full implementation of these blueprints. They are built in a function, createBluePrints(). Below is the start of this function. We define the array to hold our blueprints (this is not dynamic as the number is fixed), and then start to define our vehicles, one by one. Remember, this is a one-off exercise, so that as the game progresses, we can make multiple instances of the same entity. If we decide to change the specifications in the future, we only need to modify the code in one section.
Dim BluePrint(4) as tVehicle To create new vehicles, I can now write one function which receives the vehicle type as a parameter. The function will add a new element to the array, and copy the vehicle characteristics from the blueprint to the new instance. For completeness, the function will return the identifier (the array element number). If you need a reminder of these concepts, you will find them in the March tutorial on functions. To create a new vehicle, the main body of our code looks very simple: newVehicle = createVehicle(1) The function that this calls is below. This is a parameterised function. This means that we can expand the number of vehicle types and quantity of vehicles in the game, and it will still work without any modification. Slowly but surely, the advantages of our initial preparation are starting to pay off.
function createVehicle(vType) Before we complete this month's tutorial, we can make the code a little leaner and meaner. Certain vehicle characteristics will be the same across all instances of the same model. For example, all of our lorries will be the same width, height and length. It's turning ability is also inherent, and won't change over the life of the vehicle either. In this scenario, there is no need to copy all 3 characteristics to each instance of a lorry, we can simply refer back to the blueprint, by recording the blueprint number in our vehicle. this is getting complex, so let's see it in an example:
Now our actual vehicle has only a subset of details, but also includes the vehicle type as a characteristic. Because the maximum speed, acceleration and health are performance values, and may change as the vehicle is bumped and damaged, we need to record this specifically against each one. But if I want to check the length of the truck, I can simply refer back to the blueprint:
newVehicle = createVehicle(1) Breaking this down into the individual components will make sense of this complex looking statement: We need the length from the Blueprint. We do not store the length against each vehicle, as it is always identical for the same type of vehicle. In order to identify the correct blueprint, we get the blueprint type from our individual vehicle. In order to specify the exact vehicle we are referring to in the array, we must use the vehicle array element number. This was returned by the function when we created the vehicle. This tutorial has been a whirlwind of information. The best way to absorb it, see how it works, and realise the potential behind this approach is to see it in action. Install, review and run the sample application. This is a simple example of a number of vehicles driving around a track, the number being totally flexible and entered by the user at startup. Experiment; run for 2 or 3 vehicles, then run it again for 50! It uses the 4 blueprints outlined here, and all the methods discussed, neatly packed into the various functions. There is no collision between vehicles, but feel free to update it and post it back on the forums! Had the Romans adopted our methods, there would have been several coliseums, and gardens scaled to the size of small jungles. There would have been no need to fight, and the lions could have had a home of their own.
Until next time, happy Coding! Note: This tutorial has been packaged up into a nice friendly installer that will load a full-length (more detailed) version of the tutorial, along with DBPro source code into your Start Menu (in The Game Creators program group). Each month this collection will build-up into a formidable free resource. Download this tutorial + code: DBPro_May_Tutorial.exe 3D Foot - Human Skeletal Viewer
Now here's a deviation away from the usual games we get here! DarkBASIC Professional developer Christopher Hill recently broke his foot while jumping a fence trying to rescue his son's toy rocket. He decided he wanted to study the area more closely and learn about the foot. In this process he wrote a 3D visualisation program for Windows, 3D Foot. "A wonderful educational tool, 3D Foot is the ultimate 3D Human Skeletal Foot Viewer. 3D Foot is true 3D interactive (no quick-time movies). Use the keyboard to pan, zoom in/out, and rotate on 3 axis. Use the Selector Bar to toggle bones and soft tissue on and off. The model is of stunning quality and high-realism. This program is simple to use and an excellent teaching aid. A great way to learn the bones of the feet." 3D Foot Website: http://www.trajectorylabs.com/3d_foot_skeleton_viewer.html Coders Workshop Meet 3
Saturday 16th July 2005 - 5.00pm till 11.00pm 'Coders Workshop' is a multi language, multi platform convention for independent games programmers, designers and artists. This is the 3rd event held with much success. It is completely free to attend, and whilst aimed for independent, hobbiest and freelance game designers, there will be professional publicists and developers for you to talk too, ask questions and network with. Anyone is welcome, from novices to experts. The whole event is informal and designed to be fun as well as enlightening. Photos are available from CW2 on the web site (URL below). Quite a few Dark Basic members attended last time and it was a great night. If you are intending to come please email george at idigicon dot com (just for a head count) and tell him you read about it in the TGC newsletter. More details here: http://codersworkshop.com/viewarticle.php?id=11 More Magazine ExposureRobin, the author of Alien Racer (an Alienware competition entry game) announced on the forums that a magazine on sale in Australia and New Zealand called "PC World Minibook" featured his game, as well as carrying some other DarkBASIC powered creations. The magazine in question reviewed Alien Racer along with other DBPro games including Duo, Extranjero and Transfusion. Here in the UK on the DVD of PC Gamer magazine this month (issue 149) you'll also find a playable demo of Evochron, which we reported on several issues ago, and firm community favourite Mono. It just goes to show if you can create a good playable game like Robin and the others did, that magazines ARE interested in covering this. It may not always lead to wealth and riches, but everyone deserves their 5 minutes of fame. Congratulations to you all. If you've had a DB/DBPro game featured on a high profile web site or in print then please let us know. More details here: http://forum.thegamecreators.com/?m=forum_view&t=54133&b=2 Nanopod ReviewReviewed by TGC Developer Dave "Ravey" Milton 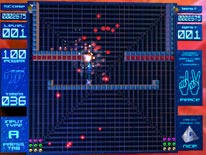 Nanopod is a retro style game which reminded me of both Breakout and Gauntlet. The object of the game is simple - blast all the enemies in as short a time as possible (there is a audible beeping which warns you of how little time you have left). You move your little nanopod around with the cursor keys and can fire in four directions using the standard FPS keys W/A/S/D. The levels look very much like Gauntlet where you have enemies trapped by walls (with a similar style to Breakout) but still able to blast you. By shooting certain pieces of the scenery you clear the walls and are able to blast the enemies back (although they know hunt you down as well as try to destroy you). The game is displayed very much like Breakout with a nice roll to the level as you move around the board. The game is fast paced from the moment you start playing and never lets up - if you like non-stop action then Nanopod is definitely worth a look. I found the warning of time running out irritating and ended up turning the sound down so it didn't shatter my eardrum, the music also carried on playing after I quit the game. These niggles aside I found nanopod to be well presented, easy to control and fun to play. Screen shots + Download: http://forum.thegamecreators.com/?m=forum_view&t=54437&b=5 geecee3Once in a while a new member comes along who, in a very short space of time, establishes himself into the community with such vigour and resolve that his talents and helpfulness shine through. It would be fair to class Grant Clark (aka geecee3) in that way. In the relatively short time he's been on the TGC forums he has given out a vast quantity of resources, demos and games. Here we cover the best for your downloading pleasure.
By the way - if you were wondering how Grant managed to get hosting on the TGC web servers it's because we recognised the quality and amount of resources he was putting out and offered him the space for free. If you're doing something similar then why not drop us a line? Visit geecee3s site: http://members.thegamecreators.com/geecee3/ Katey's Quest ReviewReviewed by TGC Developer Mike Johnson 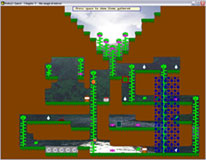
In Katey's Quest you have to guide Katey in solving puzzles and getting past monsters in this magical world she has found herself in. Upon entering the game you are presented with several options - playing the game in story mode, run through some extra challenges, secret stuff, play custom levels and finally create your own levels to play. I started off by playing the story mode. To begin with you are given some background information about Katey and this all takes place in the form of a storybook and you press a key to move to the next page to find out more. When you get in the game you control Katey in a 2D world. There are all kinds of platforms, obstacles, ladders and more to manoeuvre around. Also contained in the level are a collection of mirrors and when you stand in front of one of them you get told about a task that you need to complete. You can then choose to complete this task or go for another one. There are also signs placed around the level that give you useful information. I chose a simple task to begin with and when I entered was taken to another level where I had to go and pick up several items scattered around. One of the things I had to do here was to find a key so I could get past an obstacle. After doing this I was able to press a switch that opened up another part of the level and allowed me to get to another mirror and when there I moved back to the original level with this task complete. Moving on the next task I tried out was called "Highs and Lows". On this level I had to be careful that I didn't fall into the spike pits at the bottom and there was a certain order in which I had to do things so I could complete the level. It looks like this is one of those games that could keep you occupied for many hours. In total there's 100 levels to play with many puzzles, monster and bosses and a really nice musical score to go with it. The addition of a level editor is also a great idea. It's a very well presented game with a massive amount of levels and detail. Well worth a look if you're into platformer / puzzle style games. Screen shots + Download: http://forum.thegamecreators.com/?m=forum_view&t=54652&b=5 From the ForumsOur forums are a diverse and interesting place to hang-out and here are a selection of hot topics this month.
Newton Car Physics Demo
Hurricane
Mechwars
WyrdWorld
CEGUI
Cartography Shop 5.07 Beta
Particle Editor You can find our forums at: http://forum.thegamecreators.com 20-Liner - Circular Breakout by IBOL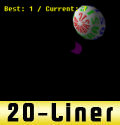
The classic game breakout realized in a circular environment; destroy the cubes moving around you by hitting them with a single bouncing ball, and keep the ball reflecting between your 'shield' and the cubes or borders of the screen. It gets more challenging as the game goes on, and also offers an impressive level of polish for a 20-liner. Compare your high scores with others' in the forum thread! (Thanks to Ian for the review) The author of this 20-Liner has won any of the DBPro expansion packs, just email us to claim your prize. Download the 20-Line code from: http://forum.thegamecreators.com/?m=forum_view&t=52589&b=11 Bitmap Font Edit + Transition Studio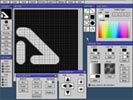
The Bitmap Font Edit will allow you to easily generate bitmap font that you can use for games, tools and other software that would require the use of bitmap font instead of using true type. It features a range of drawing tools as well as a host of automated effects which can be applied by the click of a button. Almost all effects can be applied to individual character or the entire font at the same time. The editor will arrange the character in ascii order and save the image tiled 5x12 characters or as a tilestrip with each character next to the other. It comes with a full manual and some code examples of how the bitmap fonts can be used. 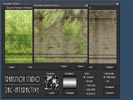
Transition StudioThe transition studio will help you make transition tiles between two images using a simple and fast point and click interface. It features 40 different gradient transitions, and the option of loading a custom made gradient. It also have image adjustment for brightness, contrast and color correction. It can generate transition tiles in four different power of 2 sizes and using the custom size, the first image will determine the output size of the transition tile. This tool is the perfect companion for someone looking to make a tilebased game. It can generate one transition at a time, or generate the entire range of 40 transition gradients in one batch. Web Site: http://www.zac-interactive.dk Beginners DBPro Tutorial - FPS Framework by Michael ShahHello and welcome to a continuation of my tutorial series. We're going to start breathing life into our game, by adding a simple GUI,sounds, collision detection, a gun and more! We will cover the following in this tutorial:
What you'll need:
Did you miss the last tutorial?
sync on : sync rate 60       `Set the refresh rate to 60
set display mode 1024,768,32 `Set the resolution of our program
autocam off                  `Tell our camera not to be repositioned after creating an object.
set window title "Whatever you want to call your game" `Our caption for the window.

mapsize =500                    `This defines how big our terrain will be.
segments= 64                    `This is the number of segements we want in our matrix.
make matrix 1,mapsize,mapsize,segments,segments `Here is our matrix, which will soon
                                                `be molded by our heightmap.
load image "heightmap.bmp",1    `This is our heightmap image.
size=256                        `Since we know our heightmap is 256 by 256 pixels, we set
                                `a variable for this.
load image "texture.bmp",2      `This is our texture for the terrain
prepare matrix texture 1,2,1,1  `This command applies the texture to the matrix.

`This next step is the most important, as we'll begin reading our heightmap data.
cls `Clear the screen, to make sure we can read the data correctly.
paste image 1,0,0 `Paste the image to the screen.
modifier=size/segments `Since our image has more pixels than we have segments, we need
                       `to make sure we can account for that difference, by getting every
                       `height after 2 pixels(256/128=2) rather than every pixel.
for x = 0 to segments
for y = 0 to segments
  pixelcolor#=rgbr(point(x*modifier,y*modifier)) `This will return the color value.
  set matrix height 1,x,y,pixelcolor#            `With the color value, we then set the
next x                                           `matrix height according to that color.
next y

update matrix 1      `Finally, we must update our matrix to show the changes that've taken
                     `place.

``````Creating the plants``````
load image "tree.bmp",3,1     `Here we load a uv map for our tree object. It's already
                              `premade, so you don't need to worry about it. It'll rely
                              `on transparency for the branches and detail(Go ahead and
                              `take a look at the image).
                              `This builds off the last tutorial, so be sure to not forget
                              `that extra texture flag.
load image "rose.bmp",4,1     `Here's our second plant, the flower(rose).

Plants=940                `This variable defines how many plants we want total. There will
                           `be an even amount of plants created(if plants is 800 then
                           `400 trees and 400 flowers will be made). Be sure to make sure
                           `the plants number is an even number, to keep things simple.

for x = 1 to Plants/2      `This for-next statement uses our plant function to create some
                           `plants. Please see bottom of source code for explanation as
  createplant(x,mapsize,1) `to how the function works.
next x
for x = (Plants/2)+1 to Plants
  createplant(x,mapsize,0)
next x
Creating the waterMany times people make creating water a huge task, and this can result in overkill in both looks and system performance. For this tutorial, all we're going to do is make a plain. Sounds a little too easy, but by placing it in the terrain, we'll let the terrain create the smooth edges of the water for us. Also, by using an object for water (versus a matrix), we can apply reflections or even (for more advanced users) shaders. Lets keep things simple right now, and just get some decent looking water.
water=5000                              `Our variable for our water object
make object plain water,mapsize,mapsize `We make it as big as our map, to ensure all areas
                                        `get covered.
load image "water.bmp",water            `Load our image we'll use to texture our water.
texture object water,water              `Texture our object
set reflection shading on water         `We give our object reflection properties.
                                        `Be careful, use this command sparingly, as it's
                                        `very system intensive.
set alpha mapping on water,25           `We give our water transparency.
                                        `This way we'll be able to see through our water.
waterheight=15                          `This is where we'll position our water on the
                                        `y-axis.
position object water,mapsize/2,waterheight,mapsize/2   `We position our water.
xrotate object water,-90                `Rotate our water.

`We don't want trees under our water, so we'll get rid of them.
`If some trees are still half under the water, you can adjust the values accordingly.
for x = 1 to Plants
  if object exist(x)           `Check to see if the object exists
    if object position y(x)<=waterheight then delete object x `Delete object if it's under
  endif                                                       `the water.
next x
`As you'll see later in our main loop,(under "[====Water===]"), we'll make it slowly
`move up and down to give it a coastline.
Creating the skysphereA skysphere is an object textured that'll act as the sky. Skysphere's are created by using a sphere of a negative size (so the faces are flipped towards you) and then texturing it.
sky=5001                            `Our variable for the skysphere.
load image "sky.bmp",sky            `Load our texture for the skysphere.
make object sphere sky,(-mapsize*2) `Here we create our sphere, and ensure it's big enough
                                    `to cover the map, by multiplying it by the mapsize.
texture object sky,sky              `Texture our sky with the sky texture.
position object sky,mapsize/2,0,mapsize/2  `We position our skysphere.
                                    `Note that we divide the mapsize by 2 because our object
                                    `has been rotated. :)
`Later on, in the main loop, we'll rotate the skysphere. This will create the illusion that
`the sky is actually moving like it really does.
The GUI`Lets first start by loading the images we'll need for our GUI. bullet_image=7000 load image "bullet.bmp",bullet_image healthbar=7001 load image "healthbar.bmp",healthbar roundsbar=7002 load image "rounds.bmp",roundsbar scorebar=7003 load image "scoreboard.bmp",scorebar `For our GUI, we'll also have a cursor which will show where our bullet fire will go. cursor=7004 load image "cursor.bmp",cursor I'm sure all you artists out there can improve upon the media, feel free to! If you haven't guessed by now, we're on our way to making a FPS. :) See section "GUI" in our main loop, to see how images are pasted
Our Player & variables Player1_Health=100 `Our player health Bullets_left=5 `How many bullets we have left in our round Rounds=5 `How many rounds we have `We now need to create our character. `We're going to use the ak-47 model from darkmatter in this tutorial as our main player. `(This model was freely distrubuted in TGC newsletter 12 `//www.thegamecreators.com/pages/newsletters/newsletter_issue_12.html) You=11000 `This is you. load object "H-AK47-Static.x",You `Load the ak-47. scale object You,1000,1000,1000 `Make the object 10 times bigger. yrotate object you,90 `Rotate our object set object collision on you `Turn on object collision set object collision to polygons you `set the collision type to polygons `For our gun, we'll also need some sounds(All sounds are included with DBP). gunsound=1 load sound "Sounds/machine gun 2.wav",gunsound `Sound for when we fire the gun. reloadsound=2 load sound "Sounds/rifle reload.wav",reloadsound `Sound for reloading and picking up ammo. `To spice things up a little, we'll add a muzzle flash that'll be pasted to screen `when we fire our gun. muzzle=7005 load image "muzzle.bmp",muzzle `It's also a good idea to set a variable for how fast our character will move. movement#=1.0 `[===Our Player variables===] `[===The ammo crates===] `Because we can't have an unlimited supply of ammo, we'll need a way to get more. `This will be as simple as randomly creating ammo boxes to place around the map. Number_of_ammo_boxes=20 `This defines how many ammo boxes we'll have in our level. ammo_image=7006 load image "ammo.bmp",ammo_image `Our ammo box texture for x =12000 to 12000+Number_of_ammo_boxes make object cube x,1 `Make our ammo crate texture object x,ammo_image `Texture our object position object x,rnd(mapsize),0,rnd(mapsize) `Randomly position our object `Here we find out how high the land is at the objects position. y#=get ground height(1,object position x(x),object position z(x)) `We reposition the object to make sure its viewable on the land. position object x,object position x(x),y#+.5,object position z(x) set object collision on x `Turn collision on set object collision to boxes x `Set the collision mode to boxes next x Setting up collisionIt's important to understand that there's three types of collision detection. Box, sphere, and polygon collision are the three DBP natively supports. Since we're dealing with cubes, the obvious choice is to use box collision. If we have a ball, use sphere collision, any other shape, use polygon collision. To enable collision, all we have to do is 'set object collision on objnum' then choose the type of collision. The statement 'object collision(obj_a,obj_b)' is then used to return whether or not collision is occuring between two objects. See 'Collision detection' in our main loop, to uncover exactly how this is done. The ENEMIES!I didn't want to leave you all hanging with nothing to shoot at, so lets create some enemies. We'll be using the alien model that was given away in newsletter 12.
Number_of_Enemies=10                `The number of enemies in the game.
dim EnemyHealth(Number_of_Enemies+1)`We create an array for each enemy to define
                                    `their health.
for x = 0 to Number_of_Enemies+1    `We set the enemy health for each of the 30 enemies.
  EnemyHealth(x)=5
next x

for x = 16000 to 16000+Number_of_Enemies
  load object "H-Alien Mutant-Move.x",x         `Our alien model
  set object light x,0                          `Disable lighting on our alien
  scale object x,500,500,500                    `Scale our object
  position object x,rnd(mapsize),0,rnd(mapsize) `Randomly position our object
  `Here we find out how high the land is at the objects position.
  y#=get ground height(1,object position x(x),object position z(x))
  `We reposition the object to make sure its viewable on the land.
  position object x,object position x(x),y#+.5,object position z(x)
  set object collision on x                    `Turn collision on
  set object collision to polygons x           `Set the collision mode to boxes
next x

set text size 36             `Set the text size
position object you,25,0,25  `Position our character
hide mouse                   `Since we'll have a cursor, we can hide the mouse
The Main Loop
do                           `Initialize our loop
`[===GUI===]
`The transparent part of the healthbar is where we'll put a box, to actually show how much
`health we have left.
ink rgb(Player1_Health*2.55,0,0),1 `Here we change the ink color based on the players health
box 120,0,(120+(Player1_Health*2.55)),50
ink rgb(0,0,0),1            `Here we revert back to the default ink color.
paste image healthbar,0,0,1 `Here we paste the healthbar image, and set transparency on.

paste image roundsbar,300,0 `Here we paste the rounds left bar.

for x= 1 to Bullets_left
  paste image bullet_image,285+(x*20),0,1 `We paste the bullets based on how many are left
                                          `and position them accordingly next to the health
                                          `bar(Be sure to enable transparency.
next x

`Next, we'll put up a little text statement to show us how many rounds are left.
text 500,20,str$(Rounds)

`Here we'll paste the scoreboard
paste image scorebar,600,0
text 630,10,str$(KillCount)                  `Tell us how many kills we have
text 830,10,str$(Number_of_Enemies-KillCount)`Tell us how many enemies are left

`---The cursor---
`Here we paste the cursor.
paste image cursor,mousex()-100,mousey()-100,1 `Be sure to enable transparency.
`[===GUI===]

text 790,80,"FPS: "+str$(screen fps())`Simple text statement that'll show the fps.
text 790,110,"Polygons: "+str$(statistic(1))
`This text will show how many polygons are being rendered.

`[====Camera movement====]
`y#=get ground height(1,camera position x(),camera position z())
`control camera using arrowkeys 0,1,1
`position camera camera position x(),y#+5,camera position z() `Position the camera

`Our old camera code was for testing purposes, so we can comment it out, or delete it.
`The first thing we must do, is establish some variables we can track our characters
`position.
`NOTE: Some of the old code using "camera" instead of object will need to be replaced.
x1#=object position x(You) `Our x position
z1#=object position z(You) `Our z position
y1#=get ground height(1,x1#,z1#) `Our y position will be set based on the grounds height.
ay1#=object angle y(You)   `Our y angle

position object you,x1#,y1#+.5,z1# `We position the gun

`Now for the basic movement.
if upkey()=1                       `We move the object forward when the upkey is pressed
  move object you,movement#
endif
if downkey()=1                     `We move the object backward when the downkey is pressed
  move object you,-movement#
endif
if leftkey()=1
  yrotate object you,ay1#-movement#`Rotate our object left when we press the left key.
endif
if rightkey()=1
  yrotate object you,ay1#+movement#`Rotate our object right when we press the right key.
endif

`We now must set the camera to follow our character.
set camera to follow x1#,y1#,z1#,ay1#,1,2,1,1
`This sets the camera to our objects position and orientation.
`[====Camera movement====]
Firing the gunSince firing a gun doesn't happen at the speed of light, we need to create a delay between each bullet being fired. This will be represented with our wait_time variable in our fire sequence. We check to make sure we have a round left and that the fire_sequence isn't going on. We also need to check to make sure our gun isn't being reloaded before we can fire.
if mouseclick()=1 and Rounds>-1 and fire_sequence=0 and Bullets_Left>0 and reload=0
  fire_sequence=1                `We initiate the bullet fire sequence.
  wait_time=3                    `Tells us how many milli-seconds we wait between each
                                 `bullet being fired.
endif

if fire_sequence=1              `When the fire sequence equals 1, then start counting down
  wait_time=wait_time-1         `until the bullet can be fired.
  if wait_time < 0                `Once the wait_time is less than 0, fire the bullet
    Bullets_left=Bullets_left-1    `We subtract bullets
    play sound gunsound            `We play the gun sound.
    fire_sequence=0                `Reset the fire sequence.
                                   `Paste the muzzle flash to the screen
    paste image muzzle,(screen width()*.5)-25,(screen height()*.5)+50,1
    position mouse (mousex()-5)+rnd(10),(mousey()-5)+rnd(10) `Add some whiplash.
  endif
endif

if Bullets_left<=0
  Rounds=Rounds-1 `When there are no bullets left, a round is lost.
  Bullets_left=5  `We reload the round.
  reload=1        `We'll go into a reload sequence, to make a little delay between
                  `reloading our weapon.
  reload_time=50  `Variable which creates how much delay there is between reloading.
endif

`The reload sequence
if reload=1
  reload_time=reload_time-1      `Slowly subtract from our reload time
  if reload_time < 0
    play sound reloadsound         `We play the reload sound.
    reload=0 `Turn off the reload sequence once the reload_time is done.
  endif
endif

if Rounds < 0
 Rounds=0 `This ensures the rounds number doesn't go below 0.
 Bullets_left=0 `If there are no more rounds, then there are no more bullets.
 fire_sequence=0 `Ensure the fire sequnce doesn't turn on, because there's no bullets.
endif
`[====Firing the gun====]
Collision detectionTheir will be two main collisions in the game:
if x1#<=0 then position object you,1,y1#,z1#
if x1#>=mapsize then position object you,mapsize-1,y1#,z1#
if z1#<=0 then position object you,x1#,y1#,1
if z1#>=mapsize then position object you,x1#,y1#,mapsize-1

`To detect collision with every single object would really bog down our system.
`Instead, we'll only detect collision with our enemy objects and ammo boxes.

for x =12000 to 12000+Number_of_ammo_boxes `Check collision between all of our objects
  if object exist(x)                       `Check to see if the ammo crate exists
  if object collision(you,x)=1             `See if collision is true between 2 objects.
    delete object x                        `If it's true, delete the ammo crate
    Rounds=Rounds+1                        `Add another round of ammo to our gun.
    play sound reloadsound                 `We play the reload sound.
  endif
  endif
next x

for x = 16000 to 16000+Number_of_Enemies
  if object exist(x)                       `Check to see if the enemy exists
    if object collision(you,x)=1           `Check to see if the enemy is colliding with us.
      Player1_Health=Player1_Health-1      `When the enemy collides with us, we lose health.
    endif
  endif
next x

if Player1_Health<=0 `A little display if you lose. We'll add to this next month.
  text (screen width()*.5)-200,screen height()*.5,"YOU Lose - Stay tuned for next months tutorial!"
endif
`[===Collision detection===]
KillsTo kill an enemy, we'll need to use our pick object command. This command lets us select 3D objects with our cursor. So, when we're clicking the mouse and selecting an enemy, the enemy will get damaged.
object=pick object(mousex(),mousey(),16000,16000+Number_of_Enemies)

`If we're firing and the object is selected, we damage it.
if object>0 and mouseclick()=1 and fire_sequence=1
  `We take away 1 health one health.
  EnemyHealth((object-16000)+1)=EnemyHealth((object-16000)+1)-1
  if EnemyHealth((object-16000)+1)<=0
    delete object object  `If the object has 0 health then delete it.
    KillCount=KillCount+1 `Add to our kill count.
  endif
endif

`Once all the enemies are gone, you've won!
`Next month, this will be much more fancy of course. :)
if KillCount=Number_of_Enemies
  text (screen width()*.5)-200,screen height()*.5,"YOU WIN - Stay tuned for next months tutorial!"
endif
`[===Kills===]
WaterTo move the water up and down, we have one variable that controls the direction of the water. Based on the waters height, that variable will change.
if down=0                         `The water moves up when down=0.
  move object water,.005          `Since we rotated the object, we use the move command to
                                  `move the water up.
  if object position y(water)>=waterheight then down=1 `If the water gets to high, down=1
endif

if down=1                        `The water moves down when down=1
  move object water,-.005        `Since we rotated the object, we use the move command to
                                 `move the water down
  if object position y(water)<=waterheight-1 then down=0 `If the water gets to low, down=0.
endif

`Just to get a little fancy, we'll color the ambient light a different color when we're
`below it. This will help make us feel like we're more under water.
if y1# < object position y(water)
    color ambient light rgb(0,0,192)           `A shade of blue.
    set shading off water                      `We'll also turn off the reflection shading.
                                               `If I didn't turn this off, we wouldn't be
                                               `able to see over our water from below.

  else
    color ambient light rgb(255,255,255)       `The default lighting
    set reflection shading on water            `Turn the reflection shading back on once
endif                                          `we're above it.

`[===skysphere===]
`This will rotate the sky slowly, making it appear more realistic.
yrotate object sky,object angle y(sky)+.1
`[===skysphere===]

`[===ammo boxes===]
`To make the ammo boxes a little more visible, we'll add some motion.
for x =12000 to 12000+Number_of_ammo_boxes
  if object exist(x) then  yrotate object x,object angle y(x)+1
next x
`[===ammo boxes===]

sync                         `Refresh the screen
loop                         `Send us back to the do statement, and repeat what's in between.
Create Plant FunctionHere's our createplant function. It operates on three basic parameters, the id, size, and an extra flag. The id represents the object number. The size represents how big the map is, so when the plants are created, they can be randomly positioned within boundries. Finally, the flag represents what kind of object you want to create. A flag of 1 will make a tree, while a flag of any other value will make a flower.
function createplant(id,size,flag)

if flag=1
    load object "tree.x",id        `Load our object
    texture object id,3            `Texture it.
    set object transparency id,4   `Set transparency on, and set the correct mode.
    set object light id,0          `Disable lighting. This usually makes objects using
                                   `plains look much nicer.
    position object id,rnd(size),0,rnd(size) `Randomly position the object on our map.
    height#=get ground height(1,object position x(id),object position z(id))
                                             `Get the height of the ground where our object
                                             `is at.
    position object id,object position x(id),height#,object position z(id)
                                             `Position our object at the grounds height.

  else

    load object "rose.x",id
    texture object id,4
    set object transparency id,4
    set object light id,0
    position object id,rnd(size),0,rnd(size)
    height#=get ground height(1,object position x(id),object position z(id))
    position object id,object position x(id),height#,object position z(id)

endif

endfunction
ClosingWe're at the point where we can actually call this a First Person Shooting game! Without comments, we still haven't eclipsed 500 lines of pure code! Just goes to show how much DBP can really do. Next month with be the grand finale. To give you a sneak peak of some of the things we'll be adding, I've made a brief preview list: A.I - Get those enemies moving and attacking! Win/Lose screens - Much more rewarding than a text statement. Menus - Everyone likes a nice little main menu and options page. Weather & special effects - The final coat of polish. More? - Who knows what will pop into my head within a month, expect more goodies. Notes and tipsStay organized. As you can see, this project has almost doubled in size! It's very important you do whatever you can to keep organized. Program running slow? Try taking off reflection shading on the water object. Reduce the number of trees and flowers in the terrain. Try re-sizing the water and making it smaller. Reduce the number of enemies. Contact: yellow1dbp at hotmail.com Download the Source + Tutorial: DBPro_May_Tutorial_FPS_Framework.zip This months winner
Each month we award one lucky subscriber a free copy of DarkBASIC Professional. The winner this month is: keithpreston@???????.ie OutroIf you have something you'd like featured in a futue issue then please get in touch, I know our 10,000+ readers would love to hear about it. |
||||||||||||||||||||||||||||||||||||||||||||||||||||||||||||||||||||||||||||||||||||||||||||||||||||||||||||||||||||||||||||||||||||||||||||||||||
 Cubic Maps Collection
 25 Seamless Sky Textures (+ demo and source)
 Fuji Boink
 Helios Rise (Scrolling Landscape Demo)
 Bitmap Fonts Collection