Editorial - March 2008

I spent much of my youth on a Dragon 32, programming Tron Light Cycles and making animations of coke cans and air guns, before working with IBM PC compatible computers at school and then work. I eventually spent my hard-earned house deposit on my own PC in the mid nineties - a 486 DX2 66 with four megabytes of RAM. In today's terms, it cost around £1385 GBP. The 486 was revolutionary in that later models included a maths coprocessor on-board. Put simply, it had the ability to perform floating point calculations as a separate process, freeing up the CPU to do the more mundane tasks.
Fast forward to 2008. NVIDIA graphics cards (specifically the 8000 series) have effectively taken on the concept of coprocessing. The CUDA (Compute unified Device Architecture) allows programmed processes to run on-board, taking advantage of any spare processing power on the card. It's not quite the same as a decade before, where performance was being squeezed from every corner of the PC, but an opportunity to offload tasks onto already-available hardware. With NVIDIA's recent acquisition of Ageia, it looks like the first major use of CUDA will be adding PhysX to the graphics card in the form of a downloadable software patch. Even though you may have purchased from NVIDIA prior to their acquisition, you might just find yourself benefitting from a significant upgrade. For users of DarkBASIC Professional and DarkGDK combined with DarkPhysics, this could be very exciting news that puts you ahead of the game.
March brings a plethora of technical advice from our contributors. Lee brings a host of shaders to download alongside his Tip of the Month, Andrew Vanbeck starts his series on building a platform game, and you'll find a running theme of success stories throughout. Enjoy!
Until next time,

contents
(1) FPSC News (2) DarkBASIC (3) Spitfire (4) Intel (5) GDK plugins (6) GDK++ Tutorial (8) Driving Success (9) Lee's Tip of the Month (10) Compos (11) DBP Tutorial (12) Toolbox (13) PlayBasic (14) From the Forums (15) Winner (16) Outro
News from the World of FPS Creator

Starbunker
 An FPSC X10 Commercial release by Kenneth J Williams
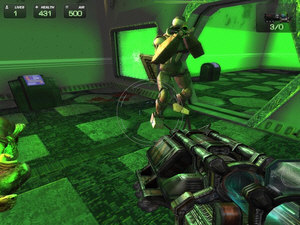
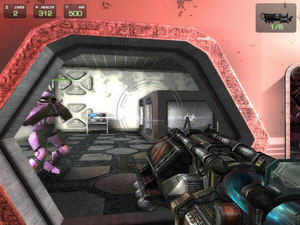
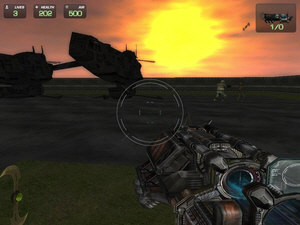
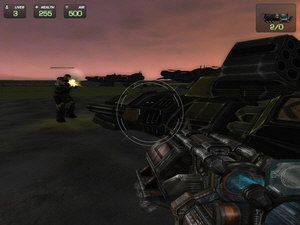
In one of the first commercially available releases built in FPSC X10, you play a soldier whose base has been taken over by unknown enemy forces. Your mission is to rescue what remains of your squadron, and ultimately regain control of the base. The story unfolds over 16 levels of gameplay. A preview of the game is available on YouTube, and as a downloadable demo. Click on the images below for a larger screenshot, or to start the playback.
![]() Starbunker is available now, priced $24.95 USD from Kenneth's website.
Starbunker is available now, priced $24.95 USD from Kenneth's website.
S3D Lite
S3D allows users to load existing FPSC rooms and move around in free flight mode. This utility allows users to see and hear what their custom textures, music, sounds, skyboxes and material sounds will be like in FPSC without having to create a test level. S3D encompasses many tasks that you could do manually, but does it quicker.
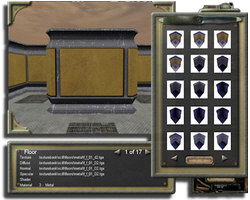 Terry Schwartz programmed this FPSC utility in DarkBASIC Professional, bringing the two sides of game development together. He has released the Lite version to get feedback on the look and functionality of S3D. Does it look professional? Is it easy to use? How is the speed? Do the colour-coded textures help? Are the PDF tutorial files easy to read and understand? and of course, does it run on your PC?
Feedback from KeithC is promising. "This program is pretty invaluable when creating your own custom work...and you want everything to be 'just right'. It saved me a great deal of time, when I had to tweak my textures (going back and forth between a few programs, rather than making a single change and having to fire up FPSC for each change). The look and feel of the program itself is very professional as well."
![]() You can find out more on the forums, where you will also find the download link for S3D Lite.
You can find out more on the forums, where you will also find the download link for S3D Lite.
DarkBASIC Professional Round-up

In the DB Pro section this month we have a couple of exciting projects, and a look at how these came to fruition. But first, we catch up on another success story from the stables of DarkBASIC Professional.
Scalextric Track Designer

Back in August 2005, Slot-it 3D was featured in the monthly newsletter. Greg Basset was keen to showcase this track designer, the development of which had consumed most of his spare time for a few months. Since then, his application has gone from strength to strength, and has now been purchased exclusively by Hornby, the company which produces Scalextric.
 Track Designer allows you to create any design you can imagine. More importantly, it uses the full catalogue of authentic Scalextric track pieces and accessories, meaning that you can transfer your creation to a real construction, knowing it will work. You can even add your room layout to the designer to ensure you are working within the confines of the actual space available. As a fan of Scalextric in the eighties, I am impressed to see that you can even raise and lower track pieces, create spiral elevations and banked curves. Click on the link to download and start playing! You will also find two video tutorials which do a good job of introducing the fundamentals.
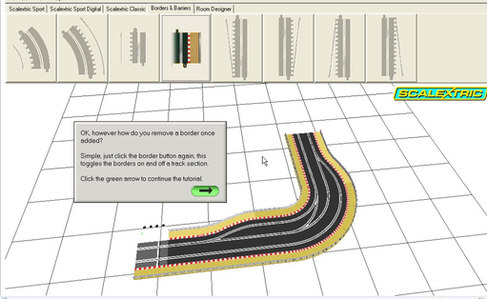
During the development of the tool, Greg faced various challenges. One of the most fundamental was ensuring track pieces could be dragged seamlessly around and simply click back into place. For anyone faced with similar challenges, here is how it works:
Click and Drag Functionality
by Greg bassett
When trying to solve the multi-select track click and drag functionality, I ended up over complicating the solution somewhat, and ended up spending more time than I would have liked attempting to make the program do as I desired.
Firstly, I investigated the glue object commands, which are useful but limited in certain areas. I ended up having problems with object scaling that meant this was not the way to go. This is the original solution.
for i = 0 to TrackSectionNo
   GLUE OBJECT TO LIMB Layout(i).ObjNo, _
      Layout(GetTrackSectionNo(lastcursorobj).ObjNo, LimbNumber
next i
Secondly, I looked at the fanastic add-on EZrotate, and with the help of the author of the product I did manage to get the program to do as I wished. However I still had certain problems with particular layout configurations.
`Setup EZrotate with Object B's current rotation
EZro_SetEuler Object Angle X(Layout(i).ObjNo), Object Angle Y(Layout(i).ObjNo), _
   Object Angle Z(Layout(i).ObjNo)

`Setup EZrotate with Object B's current position
EZro_SetPos Object Position X(Layout(i).ObjNo), Object Position Y(Layout(i).ObjNo), _
   Object Position Z(Layout(i).ObjNo)

EZro_Orbit 1, Object Position X(lastcursorobj), Object Position Y(lastcursorobj), _
   Object Position Z(lastcursorobj), Object Position X(lastcursorobj), _
   Object Position Y(lastcursorobj)+1, Object Position Z(lastcursorobj), _
   Object Angle Y(lastcursorobj)

`Calculate the new Euler angles
EZro_FindEuler
Position Object Layout(i).ObjNo, EZro_GetPosX(), EZro_GetPosY(), EZro_GetPosZ()
Finally, I took a big step back, and broke down what I was actually trying to achieve, and soon realised that I just needed to slightly modify the way my track laying code functioned, and in the end the solution to my problem was a simple change that took about 20 minutes to make and test. It involves a simple parent and child relationship to maintain the section positions.
Position object Layout(i).ObjNo,object position x(lObjNo), _
   object position y(lObjNo),object position z(lObjNo)
Rotate object Layout(i).ObjNo,object angle x(lObjNo), _
   object angle y(lObjNo),object angle z(lObjNo)
PositionTrackSection(Layout(i).TrackType, GetTrackSectionNo(lObjNo), _
   Layout(i).ObjNo)
So my tip to you, is to take a step back, and not to always try and over engineer a solution, the simplest solution is often right in front of you.
Extends 1.4 Released

The extends plugin has been updated and released as version 1.4. It includes the following changes:
- Fixed bug in the WOBBLE imageID return value.
- Changed DLL names to make DLL dependencies work
- Added internal function for DarkBASIC Professional compiler dependencies detection.
- Fixed the RealTimeSkySystem bug related to sun and moon sizes and position when scaling sky system.
- No longer need to use NULL = EXT Initialized() to initiate your source code.
- No longer need to make manual compiler includes to avoid crashes.
- Updated all samples to work with eXtends 1.4 changes
![]() Owners of the plugin can download the update from their Order History. You can browse the full details of this plugin, and purchase the product from the eXtends web page.
Owners of the plugin can download the update from their Order History. You can browse the full details of this plugin, and purchase the product from the eXtends web page.
Spitfire Maverick

This Work In Progress by Simon Keating (Fallout) is gathering a lot of interest, even though the finished product is not expected until late March. "Spitfire Maverick is inspired by an old dos game called Sopwith that I played a few times when I was kid." says Simon. "The control mechanism is quite similar, but apart from that it's my own brainchild."
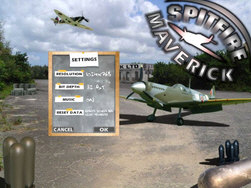 This is a well thought-out 2D aviation game, in which you attack and get attacked by the enemy force. Flying a World War II plane limits the speed and manoeuvres, whilst plenty of enemy resistance keeps you on your toes. The videos that have been produced by Simon cover all aspects of the gameplay, you'll find links to a selection of these at the end of this article.
Although a simple game concept, and simple to code according to its author, it contains some interesting effects, not least the sound effects. I asked Simon to give us an insight into this aspect of the game, and it's importance in providing the player with essential game feedback.
Player Feedback through Sound
Enemy planes use a "doppler effect" to convey their position and approach. The doppler effect is the change in a source's sound frequency, volume and spatial position with regard to the listener. Examples are bullets whistling past your ears, or the sound a car makes as it speeds by you. Since DBP has sound speed, volume and pan commands, this can easily be simulated, especially in 2D. Rather than just triggering a sound once and letting it play, you have to update it during the duration of its playback, with regard to the following concepts:
- The closer the sound is to the listener, the louder it is
- The further to the left or right of the listener, the more extreme the left or right panning
- The faster the sound is travelling towards the listener, the higher the frequency / faster the sound speed
 The volume is quite easy. You calculate the distance between the listener (normally the camera position) and the source of the sound. Using SET SOUND VOLUME, you set the volume between 100 when the sound is close to the camera and 0 when it's very far away and out of audio range.
Panning is also quite straight forward. Calculate the distance between the listener and the sound source, taking into consideration left and right positioning. Use this in conjunction with the SET SOUND PAN command to set the pan position from -10,000 when the sound is to the far left of the listener and 10,000 when it's to the far right.
The sound frequency is the most complicated part.
- Calculate the distance between the listener and the sound source.
- Next, calculate what the distance between the sound source and listener will be on the next game loop. This normally involves taking into account the x and y speeds of the sound source and the listener.
- Using the SET SOUND SPEED command, you set the speed to a base value (i.e. it's base frequency) plus the difference of the two distances, multiplied by a magic value. This results in the sound speed value being higher when moving towards the sound and lower when moving away from the sound.
22 kHz sounds are best for this effect, as you can speed them up without going over the sound cards maximum sample rate. You'll also need to test the sound speed isn't too high or low before setting it with the SET SOUND SPEED command (i.e. within the sound cards sampling range, which is 1->44000 to be on the safe side). Here is the example in code:
   `Get x and y distance between camera and listener
   xdiff# = object position x(snd_source_object)-camera position x()
   ydiff# = object position y(snd_source_object)-camera position y()


   `Calculate total distance
   dist# = sqrt(xdiff#^2+ydiff#^2)


   `Calculate total distance on next game loop
   dist2# = sqrt((xdiff# + sound_source.xspd# - Camera.xspd#)^2+ _
      (ydiff# + sound_source.yspd# - Camera.yspd#)^2)


   `Calculate new sound speed
   sndspd = 25000+(dist#-dist2#)*3000.0


   `Ensure speed is within our defined limits before setting
   if sndspd > 42000 then sndspd = 42000
   if sndspd < 18000 then sndspd = 18000

   set sound speed snd,sndspd
|
|
![]() Follow the progress of Spitfire Maverick on the forum.
Follow the progress of Spitfire Maverick on the forum.
The Game Creators partner with Intel

"The Intel® Software Partner Program guides The Game Creators toward the multi-core future for their FPS Creator X10 development environment."
 That's the strapline for the new press release from Intel regarding their partnership with the Game Creators. FPS Creator X10 is not only ahead of the game by entering the DirectX version 10 playing field, but it also harnesses the power of true multi-core processing. This is a business strategy that will drive the company forward over the coming years, and so it was not something to be taken lightly.
In early 2007, the Intel Software Partner Program helped The Game Creators develop a forward-looking business plan that would position them for success in the face of rapidly changing PC hardware. The key component of that planning was to prepare for increasingly multi-core processor designs, which required the company to embrace the challenges and rewards of software multi-threading. Intel provided reference materials and support, as well as introduced the FPS Creator X10 development team to Intel's extensive online multi-core development resources.
![]() The full story is available for download as a PDF document, and is not only a very interesting read but also an insight into Intel's dedication to gaming success.
The full story is available for download as a PDF document, and is not only a very interesting read but also an insight into Intel's dedication to gaming success.
Lee Bamber's Soapbox at GDC
"The Game Creators appeared as a feature in the Intel lounge at GDC in San Francisco this year, talking about the mulit-core features of our latest product FPS Creator X10. The 30 minute presentation, given by Lee Bamber, attracted visitors to the lounge as he talked about FPS Creator 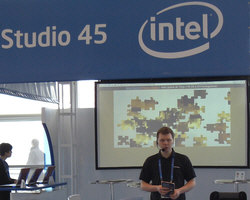 X10, and how the software takes advantage of multi-core processing to accelerate AI, light mapping and video capture where a dual or quad core PC is detected. Lee went on to give a soapbox announcement on the importance of an n-core approach to future development, and how single core approaches are rapidly becoming obsolete. With dual and quad core processors becoming the norm, eight core systems already available and the promise of up to 64 cores within a few years, TGC are taking multi-core very seriously. Our main products including Dark Basic Professional and DarkGDK have already embraced the power of n-core with our DarkAI, DarkLIGHTS and DarkPHYSICS modules, and we will continue to develop our technology to take full advantage of increased processing power now and in the future."
![]() Lee has a Software Blog on the Intel website, where you can read more about his trip to GDC in San Francisco.
Lee has a Software Blog on the Intel website, where you can read more about his trip to GDC in San Francisco.
DarkGDK for Microsoft C++ Visual Studio Express 2008

![]() This month we have a particular game highlight to bring to your attention, illustrating just what is possible. This is Star Wars: Triumph of the Rebellion created by tobi453. The complexity of the missions, the attention to detail in the models and the overall depth of the game is beautifully executed. Judge for yourselves in this preview video, and download the game from the forum thread.
This month we have a particular game highlight to bring to your attention, illustrating just what is possible. This is Star Wars: Triumph of the Rebellion created by tobi453. The complexity of the missions, the attention to detail in the models and the overall depth of the game is beautifully executed. Judge for yourselves in this preview video, and download the game from the forum thread.
GDK++ Tutorial - Loading custom media
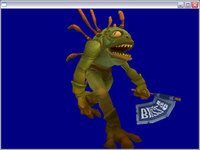 At the Official Convention in October 2007, Mike Johnson shared his techniques for using custom media in your own DarkGDK creations. Being a World of Warcraft fan, Mike's subject is the Murloc character from the game. The session took us through the definition of the file formats, how to actually track down the necessary information, and of course putting it all together to import and animate the creature.
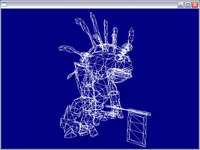 Mike has recreated this Convention presentation into a documented tutorial. You can download the tutorial now and see just how this is achieved. Although the example uses a WoW character, the principles can be applied to any source of media, and the document explains just how you would go about this.
![]() You can also download all of the source code discussed in the examples provided.
You can also download all of the source code discussed in the examples provided.
Here is an excerpt to give you a flavour of the full tutorial.
Loading an M2 file - Initial StagesThere's a lot of information available on the internet that explains how the M2 format is laid out. What we need to do is take this information and match it up to structures in C++. To start with we'll perform a simple test to determine the first block of data in an M2 file. The information I have found shows that the initial data in the M2 file provides data relating to an ID, version number, name and type of model. We can take this and create a corresponding structure: struct sM2Header What we now need to do is load our file and check if the data matches this structure. There are numerous ways of doing this and for our purposes I'm going to avoid using the file functions contained within Dark GDK. The main reason for this is that essentially the GDK file functions are simple layers on top of existing Win32 functionality. In cases such as it makes more sense to directly use the Win32 functions. We get more control and it will be faster as we eliminate some unnecessary work behind the scenes. Open the workspace and check out the project named M2 - 001. Now open the source file main.cpp. It contains source code for a very simple Dark GDK project. It begins by declaring our header data and then the main entry point is declared. The first few lines declare some variables: BYTE* pBuffer = NULL; The variable named pBuffer will be used to store data from our M2 file. The variable named fp will be our file pointer. This will be used in all file access operations. Finally iFileSize is used to store the size of the file. The next two lines declare a pointer to an sM2Header structure and also a character array which will later store the name of our model: sM2Header* pHeader = NULL; With our variables in place we're all set to load the file: fp = fopen ( "DwarfMale.m2", "rb" ); This line will open the file named DwarfMale.m2 that was extracted from our MPQ archive. The "rb" parameter means the file will be opened in read only and binary mode. The function returns a pointer to our file which is stored in the variable fp. Following on from this the code will seek to the end of the file, determine its size and then return back to the start: fseek ( fp, 0, SEEK_END ); At this point we have opened the file and know its total size. In the next stage we can create a new block of memory, copy all the data from the file into it and then close the file: pBuffer = new BYTE [ iFileSize ]; |
Driving Test Success Practical Simulator - Behind the scenes
 After the successful launch of Driving Test Success Practical Simulator, Dave Milton has taken some time out of the schedule of his next secret project to give an insight into the production of a commercial title. I have tried to keep Dave focused throughout, but ultimately the interview has been written to suit his style!
Just who are you, Mr Milton?
I'm Dave from the Game Creators, also known as Ravey. I've been with The Game Creators for over 3 years now. I was originally brought on to develop a product called "Driving Test Success Road Signs" which is a tool for learner drivers to assist them in learning all the many road signs (the product name may have given that away already!). After Road Signs I worked on some demos for DarkGDK which was being developed at the time by Mike; you may have seen Dark Dungeon and some others that I did. Recently I worked on some more demos for DarkGDK, a specific one being the Dark Invaders tutorial to help people who have come from a C++ background but never really got involved with writing games before.
Tell us a little more about DTSP Simulator
The product is another in the line of successful driving test product range. You may remember a few years back TGC developed a product called "Driving Test Success Practical". That product did well sales-wise and proved to be very popular. One benefit of writing a product to help people in their quest for a driving license is that the market never goes away, every year there are new people wanting to drive. That said, two things that do end up effecting the shelf life of a graphical driving test product are changes to the best practices of driving which are taught, and of course the graphics themselves. The original product had been around a few years and was starting to look a bit outdated. Of course we are not comparing to Need For Speed for graphical quality, but the whole engine and graphics were looking past their sell by date. Anyway, to cut a long story short, Rick and Focus Multimedia (the publishers) got together and decided it was the right time to release a new, up-to-date version of the product. The "Driving Test Success" product line is the UK number 1 for Driving Test products and naturally the only way to keep top is to keep improving - and so the project was born.
What is your toolset for a project like this?
I come from an assembler, C/C++ background so I was keen to use C++ if I could. Very fortunately, I had just finished some demos for DarkGDK at the time of the project starting, and so we thought it would not only make sense to use C++ (due to the size of the project) but also would be a good test for the GDK and help us improve that product at the same time.
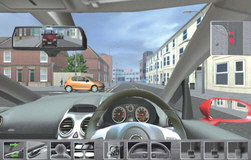 We felt at the planning stage that using physics simulation would be very important to the project, after much - and I mean much - pain and suffering we eventually chose Ageia Physics which proved to be very fast and reliable.
As far as developing our own tools are concerned Rick will back me up in saying that I probably go overboard with writing tools to make other tools that make tools - I love developing little "helper apps" to take away mundane tasks. If I have to type something more than once then that normally means I will go write a little app to write it for me. The tools I developed for the project are too numerous to mention them all but two of the key ones were:
Track editor. It was clear from the outset that a lot of different shaped roads would be needed; all kind of shapes and sizes, hills and so forth. I created a Track editor that allowed you to make a new road piece with kerbs, paths, fences and so on that would bend to any shape we wanted using splines. You could then plonk down houses, trees, pillar boxes - whatever you wanted; bend the road in a totally different way and all the pieces would bend and stay in relation to the road. This worked really well and allowed me to create many different pieces that "snapped" together kind of like the way you would build a scalextric track.
Map Editor. Similar to the way you would build any map, using the previously created track sections from the Track editor we could very quickly build large, complex maps to drive around. This editor was in fact designed to be a part of the final product, but never made it in due to us realising later down the line the amount of complexity involved in checking everything the player and other cars do conforms to the highway code.
What about the team aspect of a major project?
The team was made up of Rick Vanner (Project Manager), Myself (Lead Developer), Mike Johnson (GUI Developer), Simon Benge (Lead Modeller), Peter Jovanovic (2D artist) and Colin Lilly (Driving Instructor Expert). There were some additional people involved in providing us with voice overs, testing help etc.
In the main, the team worked very well. We all work remotely which means I don't have to smile at people when I'm not so happy which is kinda nice. It may seem strange working remotely but there are times when it is definitely the best way - during our "trials of physics" I think Mike and I would have beaten each other senseless if we had been in the same room as each other (I would have won of course). Seriously though, working remotely is nice. The journey to work for me is simply walking down the stairs in the morning. You remain focused without any distractions throughout the day and really the only problem is actually switching off from work and being able to stop yourself rather than the "I'll just get this function working then I'll stop" syndrome.
What planning goes into the project?
Plan? No we didn't plan, we just made it up as we went along. Yes I'm kidding! Rick worked on an enormous design document that set out each element of the project and gave us a very clear path to development. Of course once you start development things appear out of nowhere to cause you problems, but with a solid design to follow you can't go wrong..at least that's the theory. We worked from a big spreadsheet which broke the whole project down into months, weeks and days so we knew at any time where we up to and where we should be up to. For testing we used an online test system called OnTime which was really helpful. It meant all the testers could log on, report bugs and issues and we could instantly pick them up and respond. Everything was logged, checked, double checked etc. I would recommend OnTime as being a very good tool for any project.
I'm sure you encountered various problems?
Ah..definitely the physics. I mentioned earlier that we we chose Ageia in the end. But getting to that decision took a long long time. We tried almost everything in existence and found problem after the problem. With a racing / fast paced game you don't notice slight errors or small things happening, but when you are poodling along the road you start to notice slight inconsistencies (some of which are not so slight). The physics really delayed us completing the product and looking back (as it is always easy to do) I think we could have completed the project without any "real" physics at all, as driving along at 30mph doesn't really need an enormous physics engine behind it..but still, we got the physics in.
What were the highlights and rewards of being part of the project
 It has to be said that after two and a half years - finishing it! It was a long, hard slog for everyone involved and to finally get there felt awesome. One of the elements of the project I'm personally proud of is what I call the RoboCarAI. With the product we simply built the map, stuck the player in it - and the world just lived. Other cars drive around, pick their route, indicate, give way to others when they should etc. All other drivers on our roads obey the highway code. The AI ended up being so realistic that in the testing stage sometimes we ended up with delays on some junctions as the traffic built up. I remember one of the testers reporting how they had to wait 15 mins in a queue of traffic, I thought "Hey, how more realistic can you get than that!". Sadly I removed any queues building up but the rest remains!
Driving Test Success Practical Simulator is available to buy now from Focus Multimedia, priced £19.99. You will also find it in many retail outlets throughout the UK.
Lee's Tip of the Month - A Big Bag of Shaders
 Over a year ago, I had to prepare a demo using DirectX 9 to show all and sundry how our DirectX 10 technology might look. There were a number of prototypes, and many relied on the currently, very internal DBPro X10 compiler, except of course for the very first one, which I had been given about one week in which to write it.
This first prototype survived, and I now provide it as the meat of this tip, which you can download and compile right now, complete with media and shaders. The prototype is a simple shaders demo showing off a number of effects we hoped would finally make it into X10, some we wrote and some written by extremely talented shader authors who you will find credited in the shaders download.
The prototype includes the DEPTH OF FIELD shader which did not make it into X10, and although the download is a treasure trove of great effects, I want to focus on the depth of field effect which I feel is something I owe to all, mainly because I did not add it to the list of X10 effects.
The concept behind depth of field is that in your 3D scene there is a distance at which all your graphics are crisp and sharp, and the further away from this distance an object is placed in relation to the camera, the more blurred it gets. You can see this effect all the time when looking at photos, where the distant detail is a blur, or an object right in front of the camera (such as an errant thumb) is equally blurry.
The technique is a little shader heavy, but to explain it as simply as possible, each pixel rendered to the screen can have a red, green, blue and alpha value. The alpha channel is usually used to control how transparent an object might be. When we render our object using bumpbone.fx, you will notice we write the depth into the alpha not the objects transparency with this line:
// alpha controls depth of field (1=blurry)
result.w=IN.Depth;
When we use the post process shader DepthOfField.FX, it uses the alpha channel to read depth information (how far away from the focal point the object is) rather than transparency information (how see-through the object is). The camera needs to output its image as a floating point surface to ensure we retain the all-important alpha value; so we use a special parameter in the command SET CAMERA TO IMAGE.
rem FP Render target (full screen FP render)
make camera 1 : set camera to image 1,1,1024,768,2
set camera range 1,1,10000
position camera 0,0,0,-260
point camera 0,0,0,0
make object box 1,400,300,1
position object 1,0,0,0
set object light 1,0
cheapmotionblur#=1
load effect "media\DepthOfField.fx",21,0
texture object 1,1
In the code above, you can see where the camera is created and its output redirected to image 1 (with the special ,2 parameter). The camera is set up as normal to view the scene from a fair distance away from the 3D objects (0,0,-260) and a quad object is created to the exact dimensions of a standard 4:3 screen which we then texture with the output from the camera and apply our DepthOfField.FX shader. When this quad is rendered to the final 'visible' screen (camera zero in this case), your 3D scene blurs any pixels that are far away from the focal point. To change the focal point, you do not change the DepthOfField.FX shader, instead you change the code found in the BumpBone.FX shader at the line that reads:
OUT.Depth = (abs(worldSpacePos.z-(ViewInv[3].z+60)) / 20.0);
In this shader the depth information is calculated per vertex then passed into the pixel shader as a pre-calculated value. This is faster than calculating on a per pixel basis, and for compact geometry like animating characters looks just as good. If you wanted depth of field for large polygons such as city scenes, it might be better to calculate depth on a per pixel basis by moving the depth calculation into the pixel shader.
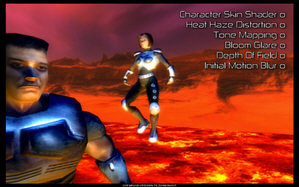 If you extracted out just the depth of field code from the prototype, you may be surprised how small your program becomes. This shader is not the only way to create depth of field, and you will understand that given the loss of transparency, why we did not use this technique in X10. As shaders go, this is actually quite timid and mastering it will give you a powerful insight into how you can turn shaders to your advantage when striving for that all important polish. If you are interested in shaders, check out our DarkSHADER product, which contains many shader effects and an export option for direct importing into your DBP projects. For those on a budget of zero however, this prototype contains a lovely bag of free shaders which will transform your single camera game into a feast of candy for the eye!
![]() Download the DarkBASIC Professional project, shaders and media now.
Download the DarkBASIC Professional project, shaders and media now.
Competitions
 As many of you are aware, there were "issues" with the supply of the prizes for the last official competition we held. The good news is that this has now been resolved, and the winners now have their hardware. It goes without saying that many lessons have been learned and that future competitions will include prizes that have been secured and supplied in advance.
In regard to future competitions, a plan has been formulated that we believe will provide an excellent platform for regular, exciting challenges that are driven by the community. It makes sense that as a company we concentrate on delivering the cutting-edge tools that you have come to expect. At the same time, we appreciate that the thriving community that has formed around our game tools forms a major part of our success.
![]() In view of these factors, a competition zone will be provided to manage community-lead challenges. To test this concept we are putting together a small team of judges, artists and web builders from the community who will be able to develop the competition zone on the TGC server, publish the first challenge and judge the entries. Anyone who is interested in helping out is more than welcome to post in the dedicated forum thread. The first competition will most likely have a retro theme, so keep an eye on the forum thread and get involved!
In view of these factors, a competition zone will be provided to manage community-lead challenges. To test this concept we are putting together a small team of judges, artists and web builders from the community who will be able to develop the competition zone on the TGC server, publish the first challenge and judge the entries. Anyone who is interested in helping out is more than welcome to post in the dedicated forum thread. The first competition will most likely have a retro theme, so keep an eye on the forum thread and get involved!
Finally, congratulations once again to the winners of the NVIDIA Shader competition. Their prizes come configured with an Intel Core 2 QUAD CPU Q6600, clocked at 2.40Ghz, NVIDIA 8800 GTX graphics card, 2 Gigabytes of RAM, and 450 Gigabyte hard drive.

DarkBASIC Professional Tutorial - Building a Platform Game

This month we welcome a new series written by Andrew Vanbeck, known on the forums as VanB. In internet terms, Andrew can be considered an oldbie, with many years of DarkBASIC experience to draw upon, along with many successful competition entries.
![]() The game you are about to construct is far more detailed than the article you see here. It is highly recommended that you download the project first so that you can refer to it whilst reading.
The game you are about to construct is far more detailed than the article you see here. It is highly recommended that you download the project first so that you can refer to it whilst reading.
Introduction
Platform games have been a staple diet of gamers for what seems like forever. Ever since the early 80's with games like Donkey Kong and Manic Miner up until the late 90's, platform games dominated the market. These days platform games tend to appear more on handheld consoles, but there's plenty space for these games on the PC - many classic platformers are actually seeing a renaissance, like Contra4 and even Bionic Commando making an appearance on new generation platforms.
This basic introduction into writing a platform game will lay out the bare necessities, platforms, movement and collision. Over the next few months we'll be going through the entire process of making a platform game, with a few elements from other game genres of course. The actual star of the game will be revealed next month, that guy with the running shoes, he's just a schlump.
Representing the map
Most platform games use a 2D grid system and this one is no different. Each grid is 5x5 units wide, stored in an array called MAP (imaginatively). This is a typed array:
col as byte
block as integer
id as integer
state as byte
marker$ as string
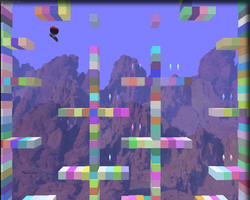 In this test, the map scrolls vertically, using a 2D array to store a grid reference. The map is 33 tiles wide by 81 tiles high, and it's currently designed using text strings. One major hurdle is making a level editor; reading data lines or parsing text to design your map can be useful when all you want to do is test a concept out before considering what your level editor might need. Because the map is only 33 tiles wide, we can pass a 33 character string to a function that will parse the string and generate a block ID number for each of the 33 tiles. Part of the level might be laid out like this:
map_set(58,"* ********* * *****")
map_set(59,"* * * *")
map_set(60,"* * * *")
map_set(61,"* * * *")
map_set(62,"* **** * ***** **** *")
map_set(63,"* *ooo ooo* *")
map_set(64,"* * * *")
map_set(65,"* * * *")
map_set(66,"* **** ********* **** *")
map_set(67,"* o o o o o o o *")
map_set(68,"* *")
map_set(69,"* *")
map_set(70,"* ********* ********* *")
Each '*' represents a platform block, and each 'o' is a collectable item. The MAP_SET() function reads the string and updates the map array. Once a level editor is made, this data can be loaded directly into the array instead.
The global variable MAP_TRAN$ is used to signify what each character represents, in this example MAP_TRAN$=" *o", so space is nothing, then each character represents incrementing block numbers. Only 2 blocks are used so far however. A capital 'S' is used to specify the start position of the player, capital 'E' signfies the level exit.
When the player touches a collectable, the relevant array location's STATE type variable is set to 1, then the object is hidden. The STATE is set so that the collectable is not constantly checked.
Controlling the character
There's really not much to the schlump, he can move left or right and he can jump, use the left and right cursor keys to move, space bar to jump. The player character has some basic animation loops, from 0 to 19 is an idle loop, 24 to 44 is a running loop, and frame 51 is a jumping pose. The animation interpolation speed is manually changed so that frame transitions can be smoothed out. If the character quickly goes from a running frame to a jumping frame, then the interpolation will slow the animation down, and it will appear nice and smooth. This is reduced until the interpolation speed is normal again.
Collision detection
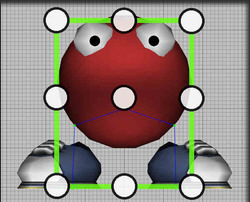 Because the map is stored in a simple 2D array, this can be used to check collision as well. By checking around the character based on a given radius and height, it's possible to get fairly reliable collision detection that is quick. The collision function is called several times to allow sliding collision detection, after adding the characters velocity to the current position, it is then checked for locations around the character as in the diagram opposite.
It's wise to make sure that the collision points fall within neighboring map locations, so in this case don't use a height greater than 10.0, otherwise the collision points may get hung on the platforms.
Once a collision has been detected, the previous location of the character is checked with each axis (X and Y), so if the last X location and current Y location result in collision, then the current Y location should be set back to the last Y location, because it's colliding, in theory the last location of the character is never colliding.
Things you might want to try:
- Add a timer and see how quickly you can collect all the diamonds and get to the top.
- Add a water level using a blue ghosted plain, and have it slowly raise up, Poseidon style!
- Add some special effects, like some particles when you collect a diamond, or some sneaker-smoke when you turn sharply.
Next time...
Next month the true identity of our hero will be revealed, along with the primary goals of the design brief and hopefully the raw beginnings of the level editor.
Developer's Toolbox
Channel 8
![]() Microsoft understand the value of keeping students in possession of their developer tools. To this end, there are various programs and initiatives to distribute the knowledge and the applications. MSDN's Channel 8 site is a central reference site, driven primarily by videos and blogs.
Microsoft understand the value of keeping students in possession of their developer tools. To this end, there are various programs and initiatives to distribute the knowledge and the applications. MSDN's Channel 8 site is a central reference site, driven primarily by videos and blogs.
Bug Tracking with OnTime

![]() As highlighted by Dave Milton earlier in this issue, OnTime is a tool by Axosoft for managing, tracking and resolving bugs. Although geared towards larger teams, it can be equally useful in a smaller environment, and there is a free version available for this scenario.
As highlighted by Dave Milton earlier in this issue, OnTime is a tool by Axosoft for managing, tracking and resolving bugs. Although geared towards larger teams, it can be equally useful in a smaller environment, and there is a free version available for this scenario.
To quote Dave, "[OnTime] meant all the testers could log on, report bugs and issues and we could instantly pick them up and respond. Everything was logged, checked, double checked etc. I would recommend OnTime as being a very good tool for any project."
PlayBasic Round-up

Follow the links below for the latest news on PlayBasic.
 The Road to Playbasic FX
Kevin's Blog on the development of the upcoming new version.
 Play Mapper Mini
A 2D surface mapping tool for PlayBasic
 2008 Game Making Competition For PlayBasic
An early notification of the upcoming competition
The Forums
We have a selection of interesting threads on the forum, including Saturn Missile defender 2, Escape Pod, PathFinders space game, Potato level editor, Thesius XIII V0.16 bunker objects, Star Captain, Lunar Caves (Lunar Lander game) and Hodges
From the Forums
A few links you may have missed over the past few weeks...
Realtime Breakable trees
Imagine tress that you can cut at any point, and they cut exactly where you hit them. Now imagine them falling just like a real tree. Oh, and you can also keep slicing the pieces as they fall. Impressive!
Tersculpt Terrain Editor
This is a freely available terrain editor, with source code included. It has been improved through user feedback. Already other users have modified and updated the application, posting the results back into the public domain.
.
Most Destructive Weapon
...in video game history. This could be the start of a new era in custom-made weapons for FPSC. We wait with baited breath to see what materialises as a result of this video. Perhaps a Take That Attack or Kaiser Chieftan Tank?
JellyCar by Walaber
Walaber is part of TGC Folklore, introducing Newton Physics to DB Pro and creating some ingenious games (Ragdoll Monkey Bowling et al). He's moved on to pastures new, recently getting airtime at GDC 2008.
.
This month's Winner
Each month we pluck one lucky subscriber from the newsletter mailing list and award them a free copy of DarkBASIC Professional. The email address of this month's winner is: pol*men**@yahoo.com If this is you then send us an email to claim your prize.
Outro
Share your news with over 16,000 active games developers!
If you have something you'd like featured in a future issue then please get in touch and include as much information as possible (including where applicable: screen shots, URLs and zip files).
Issue 63 deadline - March 27th.
Famous Movie Quote: This is where you fall down
(Johnny Cage, Mortal Combat, after hitting a stunt actor who forgets to fall)
 An FPSC X10 Commercial release by Kenneth J Williams