If you cannot view this newsletter correctly, click here to view it online

Editorial - September 2014


contents
(1) FPSCR (2) FPSC News (3) FPSCR Competition (4) FPSCR Videos (5) AGK Development (6) Kayak Escape (7) Asynchronous Animations (8) TGC Channel (9) Social Feeds
FPS Creator Reloaded - V1.0085 Hot Fix
By now our beta users will be working with Hot Fix 1.0085. If not, you should download from your account now. This is what has been delivered with this package:
- Support for the Jet Pack and new Zombie Script commands
- Added real brass ejection to the Colt 1911 complete with physics
- Added new Shotgun character to the Modern Day Asset Library
- Added Proximity Mine to Weapons, booby traps for the player!
- Single Stage Undo feature for terrain editing and entity creation
- Added RAGDOLL field allowing custom characters to use Ragdoll
- Transparency Mode 5 (glass) now renders in correct order
- RPG Weapon can now be zoomed for more accurate explosions
- Improved 'The Escape' level to make initial minutes easier
- Fixed issue causing weapons and ammo to turn blue after test game
- Custom character control via scripts
- Ragdoll model repair
- Physics weights and friction
- Entity LOD shadow fixes
- Support for multi-texture entities
- Improved muzzle flash positioning
- Better behavior for Rocket Man
- Accelerated IDE speed and better time slicing with external apps
- BSP weapons pack fix
Assets Round-up
We have a selection of screenshots for you, previewing some of the upcoming media currently in development:

Crates and Boxes

Pallets of Crates/Boxes

Army Props

Generators and Floodlights
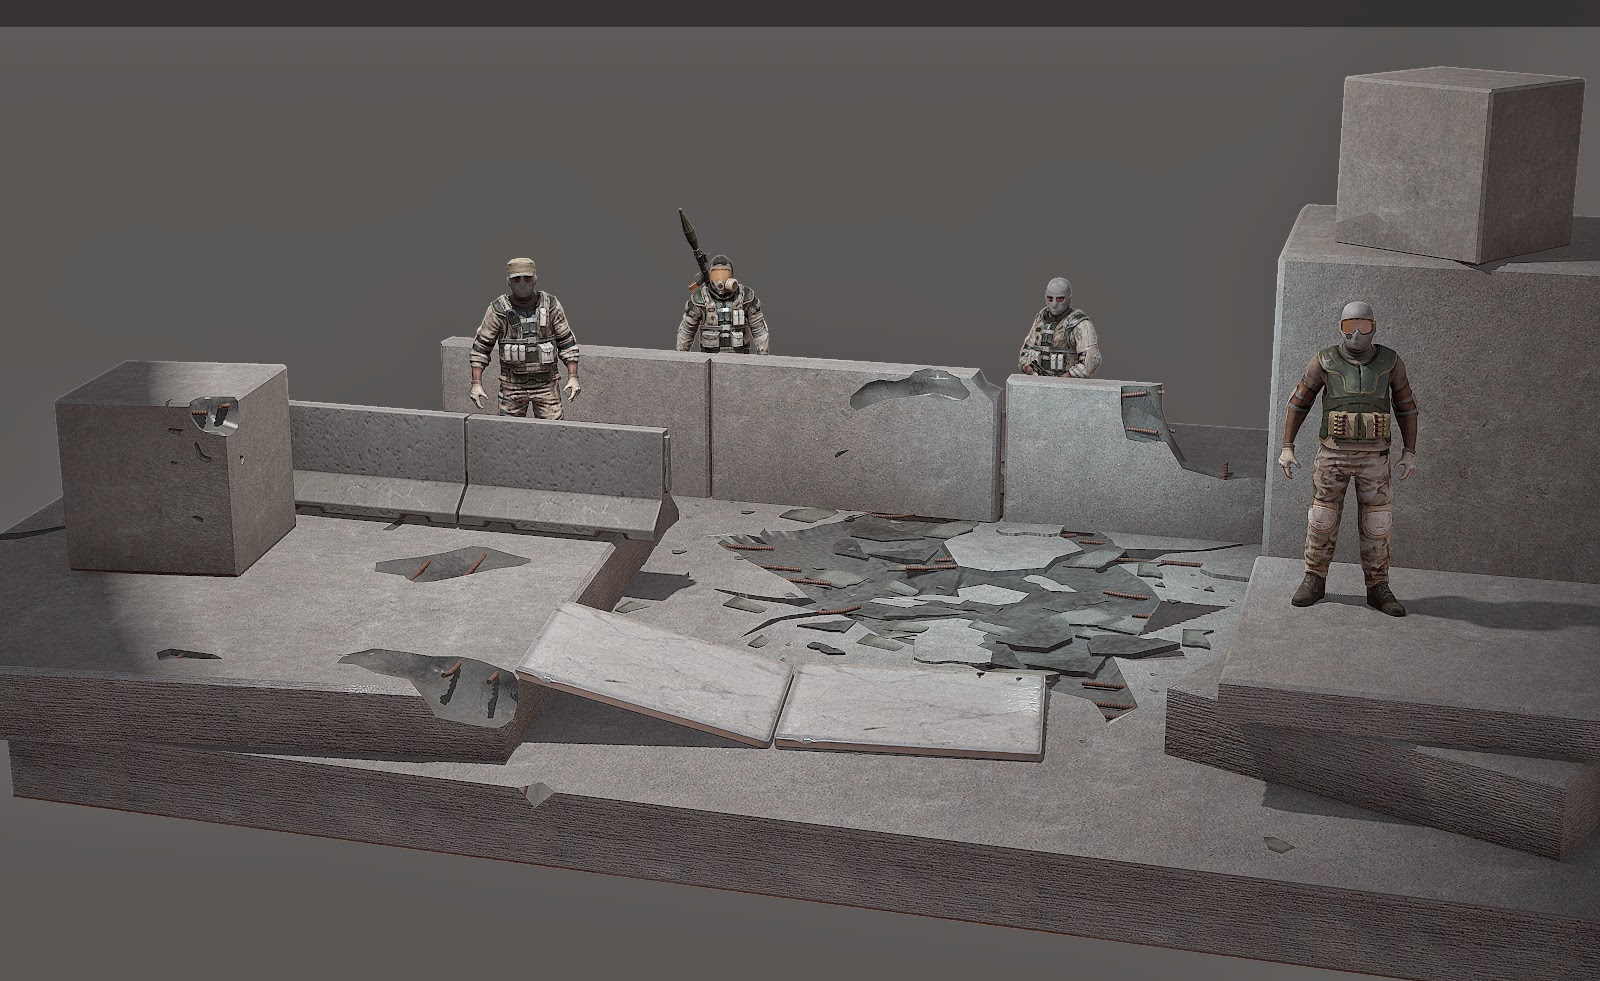.jpg "Concrete Scenery")
Concrete Scenery
FPSC Reloaded Blog
By Lee Bamber
Each month we'll update you on the progress of FPS Creator Reloaded. You will find a running commentary on the development through the FPSC-R Blog, but right here you will find some of the selected highlights that deserve your utmost attention. You can also follow the development on the official Facebook page. Within the R&D offices here at TGC, Reloaded is our main focus and we aim to constantly develop it to make it into a world class game creation tool. With great support from people who have made pledges to the project we are able to evolve and build our best game maker ever!
Lee Bamber, FPS Creator Reloaded Developer summarises the August achievements for himself and the FPSCR development team.
Baking Hot Development
One way to guarantee performance boost is to carry out some of the operations before the game even loads or starts. A big player in this field is pre-baked textures. That is, taking the visuals that won't change in game and bake them into the level itself. For example, mountains don't move so the shadow they cast on themsleves and the landscape can be pre-baked and thousands of processing cycles can be saved at run-time; you really don't need to recalculate a mountain's shadow 60 times a second. The area of the engine that focuses on this process is the Pre-Bake Ambient Occlusion code.
Here is the present HIGHEST shader with everything ramped up high and no real-time shadows present, to give you an idea of the raw clay our current pre-bake is working with:

After applying our new lightmapping process, we get this:

Once the pre-baker is integrated within Standalone Export (and perhaps even Test Game) and seamlessly working, we will switch our focus over to some serious performance work and see if we can reduce the overdraw currently hammering graphics rendering performance. This technique above should allow us to make some savings inside the shader, and other rendering processes overall, and get your FPS back to a high level.
TriPlanar Texturing.
One of the blights of many games over the past decade - including AAA titles - is stretched texturing of hills and cliff faces of the landscape. This occurs in standard UV mapping where the texture is placed from above, and on steep surfaces a small number of pixels must be stretched to cover a large (inclined) surface. Rick sent me a useful email showing a great tutorial on Triplanar terrain texturing. So well described was the technique, that it formed quite quickly in my head and I was able to see how it could be grafted to the current terrain shader. In simple terms, the texture is not UV mapped but instead it is applied 3 times on 3 axes, blending them proportionally according to the incline. You can see how effective it is in this screen shot;

As you can see, the rock texture is not stretched any more and uses it's own XY and YZ texture UV look-ups to create a perfect vertical mapping. It cost me a little performance (from 205fps down to 187fps) but will measure less than 1-2 fps when down in the 60 fps range. For this trade-up in visual quality I plan some more aggressive performance work to get that back with interest.
Jet Pack Bonus
Lee Bamberit added a new LUA command allowing the player to achieve flight, created a new HUD Layer system which can be re-used in future for more cool things like helmets, exo-skeletons and even first person vehicles

We're not referring to the Invite a Friend Bonus here, you can read about that later on in the newsletter. We recently released the Jet Pack entity as an incentive to pledge, and it caused a little concern that the mainline development was being compromised. This is one of many decisions we make every week, weighing up priorities, pros and cons of every element of development. The Jet Pack took three hours of coding, with the remainder contributed by a third party artist and did NOT distract the core development of Reloaded in any shape or form. Indeed it added a new LUA command allowing the player to achieve flight, created a new HUD Layer system which can be re-used in future for more cool things like helmets, exo-skeletons and even first person vehicles (with more art and code). It also allowed us to trial a new incentive scheme which might increase pledge levels and allow even more core engine development. So rest assured, we took advantage of an opportunity to improve the product for very little effort.
Reloaded Discount Deal
Pledge Now to support FPSC Reloaded development

Crowd funding provides a way for Indie Developers like The Games Creators to pre-fund their projects. It's also a thumbs up from customers to show the developers the market wants and needs their new idea.
By pledging you are helping The Games Creators to build the most exciting and revolutionary game creator. With your pledging support you can strengthen our team as we build this amazing technology. You are essentially becoming part of our family as you share in it's development and ultimate production.
All pledge levels grant the backer access to all betas, with other bonuses, including free model packs valued at between $18 and $39 for Gold and Silver pledge levels.
So, if you'd like to help fund Reloaded development and join us on our journey, please support us with a pledge. The most popular and best value deal is the Gold level pledge, but you can find details of all pledge levels here.
Refer a Friend, Own a Jet Pack!
As previously mentioned, FPS Creator Reloaded is now airborne! You can own the Jet Pack that inspired this additional capability simply by referring a friend to pledge to the project. They'll also get the Jet Pack, along with 4 additional textures worth a total of $30USD.
FPSC Reloaded - Competition Results


Past Life Regression
by Morphtactic


The Asylum
by Unfamilla


Follow the Line
by Sparrowhawk


Rescue the Princess
by Tomjscott


Book of Souls
by Rolfy
FPSCR Videos
We've been busy again this month uploading vidoes to our YouTube channel. You can of course subscribe to our channel and get immediate updates; the details are towards the end of the newsletter. Here is a selection of what's new this month.
FPS Creator Reloaded Waypoints
How do I use waypoints in FPSC Reloaded
A video guide to adding and using waypoints to create patrol routes in FPSC Reloaded
FPS Creator Reloaded Cover Zones
How to create custom cover zone and dynamic objects as cover
Another video tutorial showing basic user defined cover zones and character interaction with dynamic objects.
FPS Creator Reloaded customising collectables
How to use and customise collectables in Reloaded
A tutorial for FPSC Reloaded to use and customise collectables in Reloaded.
AGK V2 Developments

A Productive Month
The downside of development can be long periods of time with nothing to show. Within the inner workings there is a hive of activity but it doesn't surface until much later. This month, much of this activity made it's way to the surface, and our AGK V2 pledgers saw several deliveries of updates, along with the publication of various fixes and enhancements to V108.
Late in August we released the Mac version of the AGKV2 IDE. So users can now code and compile on Mac devices!
Here they are, all in one long list:
Version 108.23
- Fixed videos not playing on some Macs with the new API
- Fixed SetShape with mode 3 (polygon) on transparent images producing an error instead of falling back to mode 2 (box).
- Updated Facebook API
- Added user_friends Facebook permission to allow friends list with Graph API 2.0. Note that FacebookGetFriends will now only return a list of friends that also have you app installed, this is change made by Facebook
- Updated the AdMob SDK on Android as the old one will no longer work after the 1st August, you will need to import the new google-play-services project, and use the new AGKHelper.java and AndroidManifest.xml files to update your apps
- Fixed crash when more than 20 clients are connected to a server
Version 108.23b
Fixed shader error message caused by a debug file being left in the build
Version 108.24
Fixed an error when trying to compile the VS2008 template in debug mode
AGK V2 Alpha 4
- Fixed crash when deleting a physics sprite while looping over another sprite's contacts with GetNextContact
- Fixed crash when deleting the most recently created sprite or text object
- Reduced memory leak when playing OGG files, but can't remove it completely, I recommend M4A or MP2 for royalty free music
- Completely new compiler that should solve a lot of tier 1 issues
- Types can now contain arrays
- Types and arrays can now be passed by reference into functions
- Types and arrays can now be passed by value into and out of functions
- Arrays can now be sorted and searched
- Completely new IDE that should help write tier 1 apps
- IDE now supports auto complete
- IDE now supports code folding for AGK specific structures
- IDE now has symbol parsing to show you what functions/types/variables exist in a file
- Compiler errors now appear in the IDE instead of in message boxes and can now show multiple errors at once
- Fixed a memory leak when loading and deleting Spine skeletons
AGK V2 Alpha 5
- Fixed Compile/Run/Debug buttons becoming enabled before a project was opened
- Added tool tips to the Compile/Run/Debug buttons to mention a project must be open to enable them
- Fixed compiler error "Invalid path for CopyFile" sometimes appearing due to a memory error
- Modified the default syntax highlighting color scheme and added support for alternate color schemes
- Merged the project menu into the File menu
- Fixed the symbols list not rendering multidimensional arrays properly
- Changed toolbar New and Open buttons to refer to projects instead of files
- Fixed adding a new file to a project when the save dialog is cancelled
- Fixed native dialogs not redrawing properly if the Windows Aero theme is turned off or not applicable
- Fixed interpreter not responding during long loading routines
- Fixed saving new project file not defaulting to the project path
- Fixed the project open/import dialogs ignoring the native dialog setting
- Creating a new project now creates the default files main.agc and setup.agc in the project folder
- Fixed declarations like "global dim myarray" not appearing in the symbols list correctly
- Fixed indentation settings to stop converting tabs to spaces on saving
- Simplified indentation settings to be global only, which are changed in the preferences dialog
- Auto indentation now recognises AGK keywords like DO and IF as valid targets for indenting the next line
- Pressing F1 will now look for a command at the current cursor position and display the relevant help page
- Trying to load a project file with Open File will prompt to open it as a project instead
- Fixed single quote strings not being recognised
- Fixed SetErrorMode(2) on mobile devices not showing the error
- Improved SetErrorMode(2) in tier 1 by adding the line number and include file to any errors
- The symbol sidebar now recognises variables inside types, and constants
- Autocomplete will now suggest variables inside types after a period
- Code folding now recognises select statements and cases
- Added the commands FoldStart and FoldEnd to manually fold sections of code
- Added the ability to auto hide the message window when not focused
- Added a separate broadcast button instead of having run and broadcast as one button
- Added session files to the project file so it remembers what files were open
AGK V2 Alpha 5.1
- Fixed syntax highlighting of hexidecimal numbers
- Fixed Dwmapi.dll sometimes causing a crash
- Added some themes for the main IDE look
- Added an IDE option to highlight other instances of the currently selected word (on by default)
AGK V2 Alpha 5.2
- Fixed message window in Mac IDE getting progressively smaller when auto hide is turned on
- Fixed paste not working in the Mac editor window
- Fixed Mac key bindings so they default to the Cmd key
IDE Progress
You may have noticed many references to the IDE in the listed updates. The new Geany-based IDE is now in the hands of our AGK V2 pledgers and testers. With it, there have been many challenges and changes.

Compiling and Building
We have tailored the build menu to work specifically for AGK, which was one of the biggest challenges. The build menu calls the AGK compiler, and errors are displayed in the IDE output window. You can click on the error and jump to the offending line. The compiler now also outputs multiple error messages instead of just displaying one at a time using message boxes. This, we're sure you will appreciate, is a significant step forward.
Broadcasting
The broadcaster has been separated from the compiler into its own program and redesigned with debugging in mind. Rather than doing everything in one go (connect to device, upload, and run) it now accepts commands to connect to devices, upload projects, and start and stop the app running on a device. It is a console application that can be run completely separately from the IDE, or controlled with an IDE interface allowing the option for other IDEs to debug AGK apps. The networking has also been simplified so everything on a device happens through a single connection which should make it more reliable. We have broadcast apps working on Windows, Android, iOS, and Mac. Again, we're sure you can see the potential this has going forwards, especially in reducing the time taken to test games and apps.
Example Projects
All the tier 1 projects have been upgraded to the new IDE project format (.agk), and they are now installed in your user folder (e.g. C:\Users\Me\AGK Projects) so it is UAC friendly. The IDE includes an import option in the project menu to convert your existing projects to the new format; it will automatically save the new .agk file in the same place as the old project file. Right click on files in the project side bar to add and remove them from projects.
Android AGK V2 Player
The Android interpreter is on the Google Play store here or you can side load the version in the installer folder Players/Android. The online APK builder now works with this version. iOS users will have to compile the intepreter_ios project in XCode as usual.
What is Geany?
Geany is a small and lightweight Integrated Development Environment. It was developed to provide a small and fast IDE, which has only a few dependencies from other packages. Another goal was to be as independent as possible from a special Desktop Environment like KDE or GNOME - Geany only requires the GTK2 runtime libraries.
Some basic features of Geany:
- Syntax highlighting
- Code folding
- Symbol name auto-completion
- Construct completion/snippets
- Call tips
- Many supported filetypes including C, Java, PHP, HTML, Python, Perl, Pascal
- Symbol lists
- Code navigation
- Build system to compile and execute your code
- Simple project management
- Plugin interface
- Geany is known to run under Linux, FreeBSD, NetBSD, OpenBSD, MacOS X, AIX v5.3, Solaris Express and Windows. More generally, it should run on every platform, which is supported by the GTK libraries.
Coding Kayak Escape

- Easy
- Expert
- Ludicrous

Asynchronous Animations

by Sean Mann, Napland Games
The more animation and movement you have in your games, the more flashy and appealing they can be to players. In this tutorial I'll be showing you how to build animations that run in their own self-contained functions.

This allows them to be interrupted at any time, allows for simultaneous user input and anything else you wish to occur in your game loop without having to wait for the animation script to finish. In our most recent game, Sudoku In Space, we make extensive use of this for background animations, main menu animations, and particle animations when you make a completion move. Since we use a timer in Sudoku In Space, it is important to not prevent the user from interacting with the game while an animation is happening for a row, column, or block completion.
To keep things simple this tutorial will only show the background animations for the larger stars that wink in and out. If you're interested in seeing how I did the particle animations just let me know and I'll do it in a future continuation of this article.
First, we'll need a user defined type and a variable of that type. In Sudoku In Space I actually made this variable global so that all of our screens could have the background animation, however, it is not necessary if you are using the animation in only one area of your game since the function to handle the animation has a feedback loop. A feedback loop is when a function accepts input of a specific variable and then outputs to that same variable.
The following setup will make a star appear in a random location on the screen, color it one of three different colors at random, and make it grow and then shrink.
Our type:
type star_type
    max_W# as float
    dir as integer
    spriteID as integer
    abs_max_W# as float
    abs_min_W# as float
    time as integer
endtype
- max_W# will contain a random size that we want the star to grow to.
- dir is the direction of the sprite's growth.
- spriteID is the sprite ID of the star.
- abs_max_W# is the maximum width the star should ever grow to so that the sprite's image doesn't become fuzzy or larger than we want it to appear.
- abs_min_W# is the minimum width the star should ever shrink to and serves as a starting and stopping point for the shrink/grow animation.
- time will allow us to control when the star reappears.
Now let's look at the self-contained feedback loop function:
function HandleStar(star as star_type , fFT# , tT#)
    // fFT# is frame time as obtained from GetFrameTime()
	// in the main loop
    // tT# is the total time we want the growing or shrinking to take

    //the depth of the sprite
    depth = 2000

    // If the direction is 0 then this is the first time we're
    // running the function so we need to set direction to 1 (grow).
    if star.dir = 0
        star.dir = 1
    endif

    //Instantiate the sprite if it doesn't already exist.
    if GetSpriteExists(star.spriteID) = 0
        img = LoadImage(“star.png”)
        star.spriteID = CreateSprite(img)

        // We'll allow the star to grow up to 5%
		// of the screen width.
        star.abs_max_W# = 5.0

        // The star image was designed for an 800px wide screen
        // We want to prevent it from being smaller
		// than 10px at 800px resolution
        star.abs_min_W# = 100.0 * 10.0 / 800.0

        // Initialize the size at the minimum size
		// so that it will grow
        SetSpriteSize(star.spriteID , star.abs_min_W# , -1)

        // Initialize the max_W# variable to a negative so that
        // we can set it to a random value
        star.max_W# = -1.0
    endif


    // Initialize the animation variables – this happens every time the
    // star is shrunk to its minimum size as well
	// as the first run of the function
    //
    // If the max_W# variable is negative then we need to
    // determine a random size we'll allow the star to grow to
    // as well set it's initial position, color, and angle

    if star.max_W# < 0.001
        // Determine a random value for the max width to grow to.
        // Here I multiply the maximum and minimum by 100 so that I can
        // make use of the random() function which only works on integers
        // and then divide by 100. This way the star can have a max width
        // with fractional percentages.
        r_low = floor(100.0 * (star.abs_max_W# - 0.4 * star.abs_max_W#))
        r_high = floor(100.0 * (star.abs_max_W#))
        star.max_W# = random(r_low , r_high) / 100.0

        // Similar is done to find the initial position
        r_x_low = 100
        r_x_high = floor(100.0 * (100.0 - star.max_W#))
        x# = random(r_x_low , r_x_high) / 100.0

        r_y_low = 100
        maxY# = 100.0 – GetSpriteHeight(star.spriteID)
        r_y_high = floor(100.0 * maxY#)

        y# = random(r_y_low , r_y_high) / 100.0

        // Now we can position the star
        SetSpritePosition(star.spriteID , x# , y#)

        // Give it a random angle for more randomness
        r_angle = random(1,360)
        SetSpriteAngle(star.spriteID , r_angle)

        // Set the time at which we initialized the star and make it visible.
        star.time = GetMilliseconds()
        SetSpriteVisible(star.spriteID , 1)

        // Set random color
        r_color_num = random(1,4)
        if r_color_num = 1
            color$ = "200,255,255" //blue-ish
        elseif r_color_num = 2
            color$ = "255,255,200" //purple-ish
        else
            color$ = “255,255,255” //white
        endif

        // This is a home brewed function I use that makes it a
        // Little easier to set sprite colors –
		// included after this function
        _SetSpriteColor(star.spriteID , color$)
    endif


    // Now we can actually animate the growth and shrinking of the star.

    // Determine the distance between the random width we grow to
    // and the minimum allowable width.
    dist# = star.max_W# - star.abs_min_W#

    // Get the current widht of the star so we can see if it should still
    // grow or shrink
    current_W# = GetSpriteWidth(star.spriteID)

    // Initialize this to a negative so that we can skip the sizing of
    // the star when we're pausing between appearances.
    new_W# = -1.0

    // If the direction is 1 then we are growing the star
    if star.dir = 1

        // If the current width is less than the maximum
        // width we want the star to grow to then grow it!
        // Otherwise stop growing and negate the direction
        // So that it will start shrinking.
        if current_W# < star.max_W#
            // Here we use a linear equation based on frame time (fFT#)
            // to increase the size of the sprite over time tT#
            new_W# = current_W# + dist# * fFT# / tT#
        else
            // We're done growing, so negate the direction
            new_W# = star.max_W#
            star.dir = star.dir * -1
        endif


    elseif star.dir = -1  //Otherwise we're shrinking the star

        // If the current width of the star is still greater
        // than the allowable minimum width then grow it.
        // Otherwise stop.
        if current_W# > star.abs_min_W#
            // Use the same linear equation for growth based on frame time,
            // but negate the distance variable
			// so we're making the width smaller.
            new_W# = current_W# - dist# * fFT# / tT#

        else

            // We're done growing so set the new width to the minimum width
            // Doing this helps if a large number of frames were skipped.
            new_W# = star.abs_min_W#

            // Hide the star for now because we're going to wait to make
            // it reappear
            SetSpriteVisible(star.spriteID , 0)

            // Now when it is time, set max_W# to a negative to
            // reinitialize the star's animation (random max w, color, position)
            // The calculation here is tT# in seconds which needed to be
            // converted to milliseconds – so basically we're adding 3 seconds
            // before the star will restart the animation.
            if GetMilliseconds() > star.time + 3000.0 * tT#
                star.max_W# = -1.0
                star.dir = star.dir * -1

            endif
        endif
    endif

    // Only grow and reposition the star if new_W# if positive.
    // This allows us to skip over the sizing when the star is waiting
    // to be reinitialized
    if new_W# > 0.0
        x# = GetSpriteXByOffset(star.spriteID)
        y# = GetSpriteYByOffset(star.spriteID)
        SetSpriteSize(star.spriteID , new_W# , -1)
        SetSpritePositionByOffset(star.spriteID , x# , y#)
    endif
endfunction star
This is used to color sprites with only acomma separated string for the R, G, and B values.
function _SetSpriteColor(iID , sColor$)
	if GetSpriteExists(iID) = 1
		r = val(GetStringToken(sColor$ , "," , 1))
		g = val(GetStringToken(sColor$ , "," , 2))
		b = val(GetStringToken(sColor$ , "," , 3))
		SetSpriteColor(iID , r , g , b , 255)
	endif
endfunction
Now all that needs to be done is run this function in a loop like so:
myStar as star_type
shrink_grow_time# = 0.50

do
    ft# = GetFrameTime()
    myStar = HandleStar(myStar , ft# , shrink_grow_time#)
    Sync()
loop
Hopefully you can also see how this can be extended for more complex animations where there are various states for the animation. One example you can see is in Sudoku In Space on the home screen. Our game character, Allen the Alien, flies onto the screen, appears to hover with some up and down tweening, and continues to do so until the player presses the play button, at which time he flies away. I also built that animation so it can be interrupted and the player does not need to wait for Allen to be in the center of the screen before they can tap a button. Tapping a button will simply allow Allen to keep moving across the screen until he's gone.
In Sudoku In Space we take advantage of this method for many of the animations so that user input is not hampered. Please take a look at the game to see these animations in action. The most complex of them are the particle animations for when you complete a puzzle. If you'd like to see an example of that in a future tutorial, just let me know (naplandgames@gmail.com)! Sudoku In Space is free on Google Play and the App Store.

![]()
You can get this and other articles by Sean Mann in previous newsletters, or on Sean's Blog at http://blog.naplandgames.com
The TGC YouTube Channel
 Have you visited the TGC YouTube Channel yet? You may be surprised:
- Over 150 videos!
- Over 800,000 views!
- Over 2,400 subscribers!
![]() Take a look at our channel now, and make sure you hit the subscribe button to stay up to date with new video uploads. Very often you'll get advanced previews of upcoming news.
Take a look at our channel now, and make sure you hit the subscribe button to stay up to date with new video uploads. Very often you'll get advanced previews of upcoming news.
Keep up to date with TGC on Facebook & Google+
![]() Join over 6,300 fans on TGC's Facebook page to keep bang up to date on news, user projects from the forums and discussions.
Join over 6,300 fans on TGC's Facebook page to keep bang up to date on news, user projects from the forums and discussions.
We're keen to hear from all our avid users and we always love to hear what you've been up to with the tools we sell. So if you have something you want to share with the wider TGC audience why not post it into the TGC Facebook page?
FPSC Reloaded
 There are now over 2,700 fans discussing Reloaded on our Facebook page right now. Whether you simply want to see the update and progress news as it is released, or get involved in technical discussions about LOD, Light and lots of other topics, sign up to this page today to be part of it.
App Game Kit
You can join in the Facebook discussions in our AGK group page with over 600 members and we have a new AGK Facebook page.
Google+
You can also follow our products on Google+
“No one has ever become poor by giving.”
Anne Frank